Below is your breakdown of how to embed a logo in a concrete counter.
A couple months ago a neat really cool company from Missoula, Montana named onXmaps came to me and asked if I'd be interested in partnering on a DIY project for their brand new office building. They wanted something unique to them, that no one else in the world had. So.... we decided to do a rustic style counter area and to use concrete for the top.
I had a blast working on this project and wanted to share it because I couldn't find many videos out there showing how the process was done. Here is an overview of the entire process in under three minutes. The table turned out great and has had many compliments.
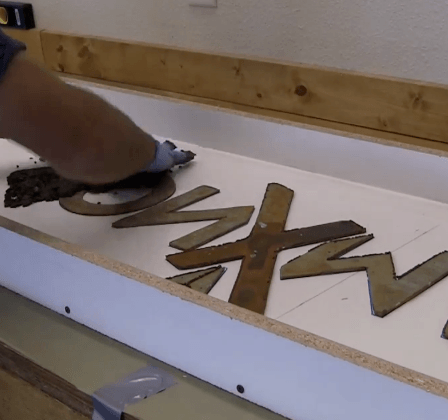
To complete this project, I built the mold similar to how I did in the past video below. The big difference was how I embedded a logo and then polished the top with a wet grinder instead of using an orbital sander. I then patina'd part of the logo to give it a rusty orange finish.
If you need tool recommendations or are curious about the tools I trust and use in my builds? Visit my Storefronts at Amazon and Lowes to find everything I recommend for DIY projects big and small!
To cut the metal, I used a plasma torch that I picked up from Amazon. This is one of my favorite tools in the shop. While it is expensive, I've easily been able to make my money back many times over from the art and furniture projects it has helped create. If you don't want to invest in a plasma cutter, simply find a company with a CNC machine and send them your design.
The other specialized tool used in the project was the wet polisher. This allows you to expose aggregate in the concrete and to make the logo flush with the top. It will also give you a very nice smooth and polished look. Along with a wet polisher, you'll want to pick up some concrete polishing pads. I use 5 inch pads and a 5" backer pad for all of my concrete table and counter polishing.

If you are interested in seeing the complete 20 minute tutorial please send me a message on my contact page. In the video, you'll learn how to keep the logo from shifting, fill in bug holes, polish, seal, and to create a beautiful piece with confidence. With the membership, you will get all of the exclusive content I create, forums, access to the forum, and be connected with folks like myself who will answer all the questions you have about your DIY projects.
Other Projects from DIY PETE
If you enjoy this project, please check out some of our other projects, detailed build plans and don't forget to subscribe to my Youtube Channel. Cheers!