DIY Concrete Coffee Table for the Patio
Hey guys and gals! So I was in need of a coffee table for the patio, and here is what I came up with! Since I love the look of concrete, I created a simple and sturdy wood base out of cedar wood and then created a concrete top. Concrete looks great, is affordable, and is built to last both indoors and out. This is an excellent DIY concrete project for beginners and the more experienced alike. This concrete coffee table will make a bold statement, and look great. The concrete portion will take a bit more time, but will give you a beautiful top that will last for years. The project is attainable by anyone if you follow step-by-step below.You will learn how to make a concrete top that appears to be 3 inches thick, but that is actually only 1 ½ inches thick throughout the majority of the piece. This is accomplished using foam in the mold. This technique will drastically reduce the weight of the project and save you money on materials.
The complete Youtube video and project tutorial photos to go along with these plans can be found below.
Part 1 – Concrete Coffee Table top
Part 2 – Wood Base
Tools Needed
Miter Saw– I’d recommend a 12 inch miter sawTable Saw OR Circular SawDrillImpact Driver (Optional)Orbital Sander– Ryobi makes a nice one.JigSawRespirator maskConcrete TrowelKreg JigBolt CutterRubber mallet or something to vibrate concreteTrowel (or putty knife ) – to help smooth underside of concreteChisel or flat blade screwdriver to remove sidewalls of moldFlat pry bar to easily remove foam (optional)
Tape measure, straight edge, pencil
Respirator/dust mask, eye, ear, and hand protection*Please note some of the links in this tutorial are affiliate links. By using the links to purchase products, you’ll help support more projects on DIYPETE.com. Thank you 🙂
Basic Supplies Needed
Concrete Part of the Project: 4×8 Sheet of Melamine (¾ inch thick)Concrete Mix (Countertop or 5000 PSI bag mix) Portland Cement for paste to fill in voids (mix with water or acrylic fortifier)Cheng Concrete Sealer and Cheng Concrete waxLED Lights ( Optional )Battery Powered LED Lights ( Optional )
Wood Base Part of the Project:
4×4 and 2×4 boards, Fence Pickets
Approximate Total Cost for Concrete Top and Wood Base: $255 using Cedar or $221 using Pine
Detailed Downloadable Plans Cut the Melamine
We'll start this project by marking and making cuts for the melamine form. You’ll end up using a good portion of a full 4’x8’ sheet of melamine. I’d recommend cutting with a circular saw or table saw. Once all of your cuts are made, we’ll assemble it.
Assemble Melamine Form
Set the large, bottom piece of the melamine form on a flat, level work surface. With melamine forms, you’ll want to be sure to keep it very clean and make sure there are no imperfections or chipping in any of the boards. Whatever faces the inside of the form will translate onto the concrete top after it's poured.
We’ll assemble the sides with wood screws. Be sure to pre-drill all holes before adding the screws and make sure everything is square, level, and flush when you’re screwing it together. Don’t add wood glue to the sides of the melamine form, because we’ll need to easily deconstruct it later.
 Finish the Form and Cut Reinforcement
Once your melamine form is all screwed together, we’ll want to seal the edges of the inside of the form. The best and easiest way to do so is by adding a clean bead of 100% silicone to the edges. Follow through with a beveled edge tool and make sure there is not an excess of silicone on the mold.
We’ll then need to cut a piece of steel reinforcement for the concrete. The easiest way to cut this is with a wire/bolt cutters. Make the reinforcement 2” or so less than the size of the full form and concrete top.
 Create Foam Knockout
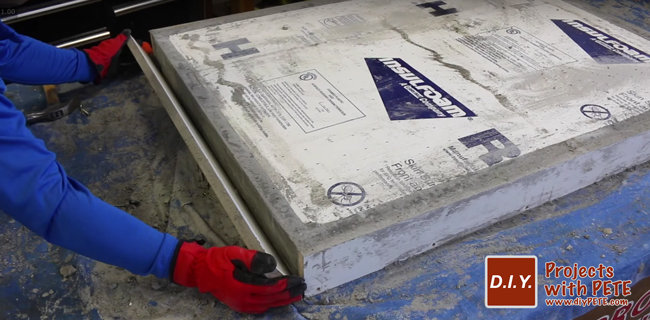
A foam knockout allows you to create a very thick looking concrete top with a fraction of the weight and cost. We’ll have a 1 ¼ inch wide apron that is 3 inches thick and runs around the perimeter of the piece. Cut the foam to size.
The foam will stay in place while filling the mold with concrete by securing the foam. Cut 3 scrap boards to 37 ½ inches in length and approximately 3 inches wide. Space them evenly and attach them to the foam using silicon or wood glue. Let the glue cure completely. Screws can be added similar to in the video, but will not have much holding power. You’ll fasten the boards to the form once we’ve started filling it with concrete. I used the reverse cast technique in this project, but if you are good with a trowel and want to try a right side up cast then check out my DIY Bar project. to see the process. 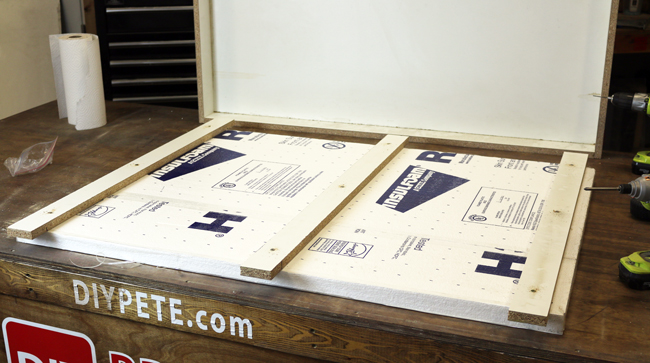
Pour Concrete into the Form
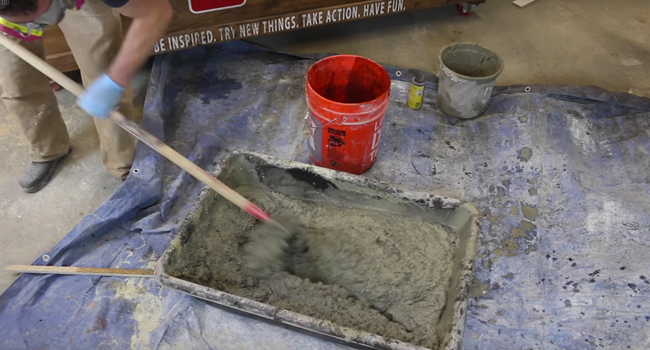
Mix the concrete (1 or 2 bags at a time) and get it to a consistency that is peanut-butter-like. Next, we’ll add it to the form. Wear gloves for this process, spread the concrete evenly in the form and fill it a little more than ¾ of an inch full. Vibrate the concrete and then insert the steel re-enforcement. Next, continue filling the mold until it is about 1 ½ inches of concrete. Then insert the foam and secure the foam in place by pre-drilling and attaching the foam support boards to the outside boards of the mold. Make sure it is centers, so the apron running around the sides is equal. If you’ve slightly over-filled the mold, gently push the foam back and forth to help move the concrete out from the center and into the apron area. Continue packing the mold with concrete and vibrating the concrete to remove air voids.
Mixing concrete in a tub with a mason's hoe
Spreading concrete into the mold
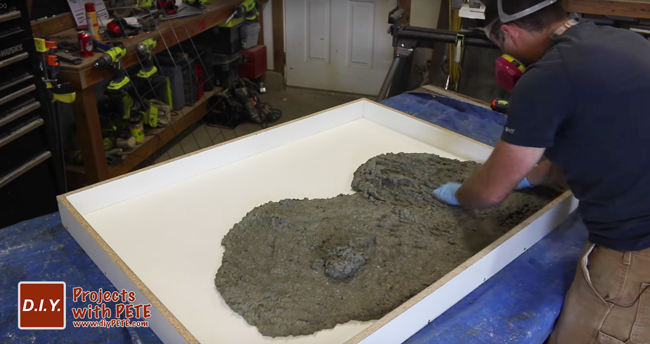
Filling the 3 inch apron with concrete
 Trowel, Level, and Let Cure
Once you’ve filled the form with your concrete mixture, we’ll want to level and smooth it all out. Use a trowel or putty knife to help smooth out the apron area once it’s been filled with concrete. Then we can vibrate the concrete either with a mallet, reciprocating saw (without the blade in), or orbital sander. Spend some time vibrating the concrete. I’d recommend letting the concrete firm up for a few hours (once you know the foam will not move — and to remove the 3 boards that hold the foam. This will allow you to make sure the areas underneath the boards are filled with concrete. Add concrete to this area and level as needed. Make sure you do this prior to the concrete curing (otherwise it will not bond correctly. Lastly, cover the whole concrete top with a plastic cover to help it cure evenly. Let the concrete cure and dry for the manufacturers recommended time. (I recommend at least 48-72 hours)
Showing the concrete once cured in the mold
 Take the Concrete out of Mold
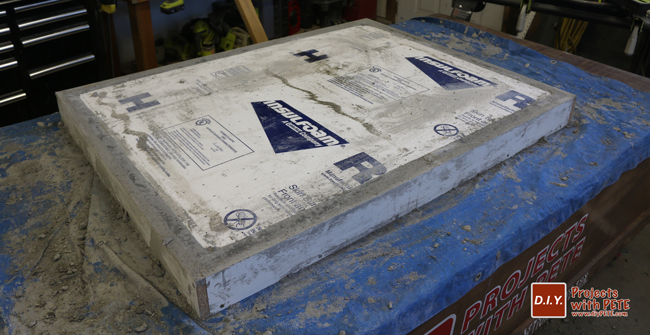
We make it a point to do the concrete portion of this project first, because the curing and setting of the concrete takes some time. Refer to the manufacturer's recommended timeframe and remove the concrete top from the mold when it’s ready. Be sure to ask a few friends for a hand in this, as the top is very heavy and the moving of it shouldn’t be attempted by just one person. Carefully deconstruct the melamine mold and take it off of the concrete. After the sides are off, flip it all over and take the main top piece off. The concrete will still be curing and needs more time after the mold is taken off. Let it do it’s thing.
 Finish the Concrete
Now we’ll sand, spot fill, and seal the concrete dining table’s top. Take the time that this step requires, paying special attention to sanding and filling in any voids. Sand the entire top down with 120 or 220 grit sandpaper, again flipping the top over (with help) and being sure to sand down everything. Spend time easing the edges of the concrete top, the corners, the underside edges and any spots where hands, arms, and anyone might touch.
Sanding Concrete
 The Portland cement slurry mixture that I use to fill voids in concrete tops is an easy mixture to make, it’s simply water (or acrylic fortifier) and Portland cement. Make this mixture and fill in any spots that you may see. Let this dry and cure before sanding it down again. After the final sanding, I like to use a blue scotch pad and a little water to help clean the concrete prior to sealing. Then we’ll add our sealer! I used a 100% food safe, high quality sealer made by Cheng Concrete Products for this. Grab your desired sealer, dilute it down with water and apply nice, smooth, even coats making the water to sealer mixture stronger (less diluted) as you go. You can apply as many coats as you’d like, I did about six coats with the final coat being nearly 100% sealer. Let this cure and dry for the manufacturers recommended time. I use Cheng Concrete Sealer and Cheng Concrete wax.
Filling air voids with paste

Second round of sanding to remove excess paste

Sealing concrete
 Wood Base
The wood base is built out of 2×4 boards, a 4×4 board, and 1×6 fence pickets. I’d recommend cedar or redwood if you plan to use this table outdoors. Pine, spruce, fir, and other woods can be used to cut the cost down.
Start by cutting the boards to the lengths provided in the cut list. Use a pocket hole jig and 2 ½” pocket hole screws to attach each of the boards at the ends.
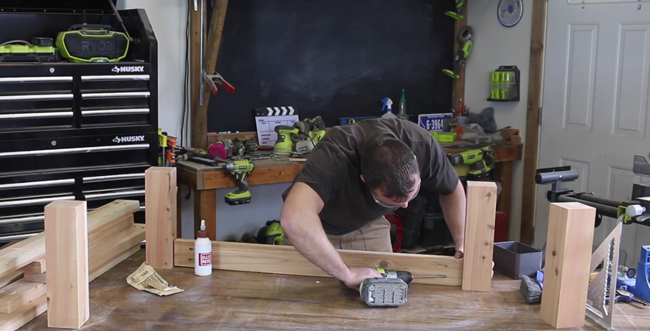 Attach the two upper supports in the middle. These help strengthen the table and allow the weight of the concrete to distribute more evenly.
Connect the lower outside boards. Use 2 ½” pocket hole screws to connect each board to the 4×4.
Add a lower center support to strengthen the base, and to provide additional support for the fence pickets which will form the lower shelf.
Cut the fence pickets down to size. For each outer board, cut a notch out for the legs using a jigsaw.
 Connect each end board by pre-drilling and then attach with screws.
Continue attaching each picket.
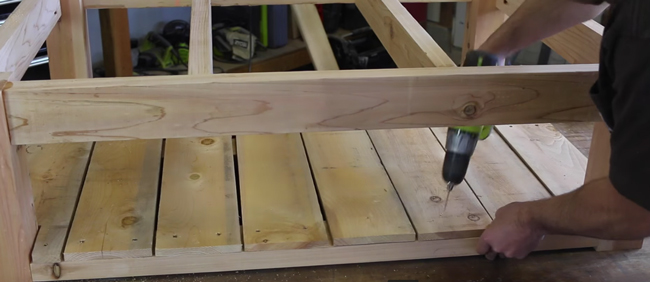 Attach the caster wheels to the bottom of each leg. Pre-drill and then use wood screws. I’d recommend using small washers to prevent the screw head from being too small for the caster wheel hole. You will likely need to slightly angle the screws in toward the center of the 4×4 depending on the plate size on the caster wheel.
 Finish the Base
Sand the table as needed to prep it for stain or a finish of your choice. I used espresso colored stain and followed with an outdoor urethane. (deck stains are also a good choice) Allow the finish to dry completely.

I’d recommend running a bead of silicon around the top of the wood prior to putting the concrete top in place. This will prevent the concrete from shifting. Then find a friend to help lift the concrete onto it’s base. Center it as best as possible. There will be a channel between the concrete and the wood — where you can run optional LED lights if you’d like.
Assemble, Install, and Enjoy!
Run a bead of silicon around the top of the wood base. Then center and place the concrete top on the base. The concrete is heavy and won't budge much, but the silicon will make sure to keep it in place. Be sure to have a couple of friends help you move this around, it’s going to be heavy! Best of luck on yours. Photos below of my finished product. Cheers!
Need the measurements, diagrams, and a little more guidance? Check out the concrete table plans for the concrete top, concrete mold and base here!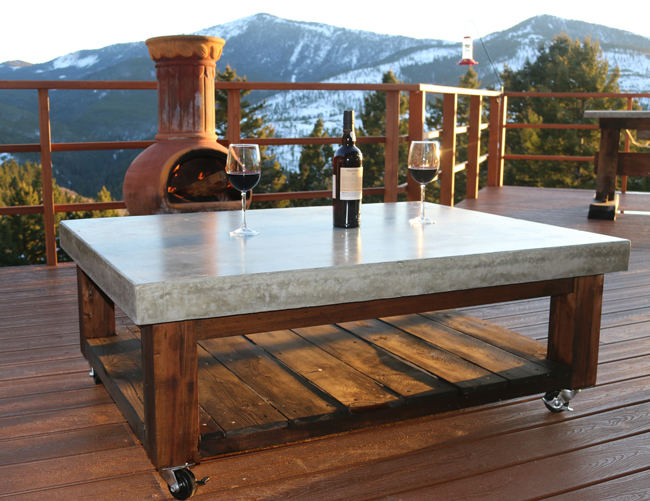 Cheers!
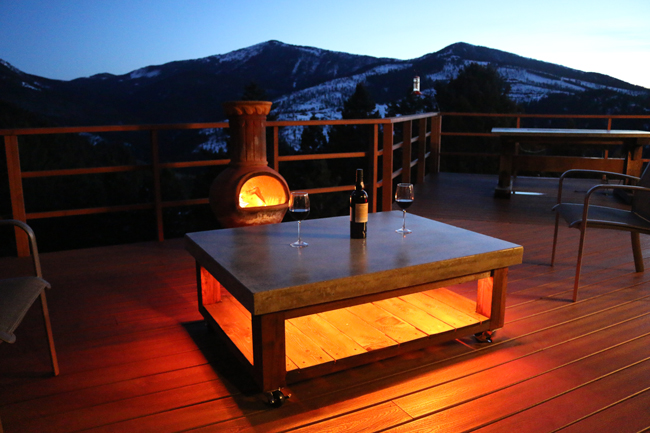
Thanks so much for checking out the Patio Concrete Coffee Table post and I’d love to hear how your project goes! Please post photos on Facebook at www.facebook.com/diyprojectswithpete and subscribe to my Youtube channel at www.youtube.com/diyprojectswithpete.


 Finish the Form and Cut Reinforcement
 Create Foam Knockout
 Trowel, Level, and Let Cure
 Take the Concrete out of Mold
 Finish the Concrete
 Wood Base
 Finish the Base