This tutorial will show you how to make a DIY Kitchen Island Cart.
I worked with Krylon® Brand to build this project and used Krylon® ColorMaster Paint + Primer - 25% More. The Kitchen Island Cart is a useful and great addition to any kitchen that needs some extra counter space. It also comes in handy for all sorts of other occasions when hosting family and friends for get togethers and over the holidays. I'm sure that you will love having the kitchen Island cart around! Click here to Download the FREE Kitchen Island Cart Plans.
Gather Materials
For this build of this DIY kitchen island cart, you will need plywood, 2x2 boards, hinges, drawer slides, cabinet handles, wood screws, glue, and Krylon ColorMaster Paint + Primer – 25% More in Satin Jade and Satin Bright White available at Walmart.
Need tool recommendations or curious about the tools I trust and use in my builds? Visit my Amazon or Lowes Storefronts to find everything I recommend for DIY projects big and small!
Make Your Cuts
Get started by cutting the boards to size.

This project uses 2x2s as well as plywood so you will need to use a combination of a miter saw, a table saw, and a circular saw to accomplish the cuts.


Assemble the Base
Assemble the base using pocket holes. Attach boards to the bottom shelf and then attach the legs.

Attach the side walls for the cabinet area. Finally, attach the base of the cabinet.

Add Trim and Support for Drawers
Before you can install the drawers, build face trim for the drawer to come flush with and a center support to attach the inner drawer slides to.

Build and Install Drawers
Build the drawers using pocket holes and glue.

Once assembled, install the drawers and drawer slides. See the video for more details on how to install the drawer slides.


Install Cabinet Doors and Hardware
Install the doors and hinges. Follow the proper installation procedure for the hinges that you are using. I found the easiest way to install the hinges was with the cabinet on its side.

Build the Table Top
Build a table top for your Kitchen Island Cart. I chose to use concrete but you could use wood or anything that you think would look great and fit in with your kitchen.

Paint
Now it is time to paint your Kitchen Island Cart. Remove all cabinet hardware and prep the area with plastic or drop cloths. Grab a good respirator and make sure you have proper ventilation during the painting process. Make sure you read the safety and application instructions on the back of the can before you begin painting.

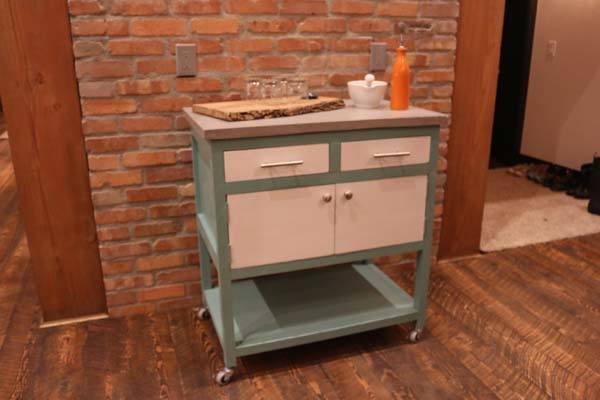
I used Krylon ColorMaster Paint + Primer - 25% More in Satin Jade for my main color on the kitchen island.

I used Krylon ColorMaster Paint + Primer - 25% More in Satin Bright White as an accent color on the drawers and doors.

The Krylon ColorMaster Paint + Pimer = 25% More had great coverage and I was really pleased with the final product. It is a paint + primer so there is no need to use a separate primer. I used 3 to 4 coats of paint on the project.

Enjoy!
Once the Kitchen Island Cart is painted we can reinstall the hardware, drawers, doors, and tabletop. Now you can enjoy the functional and beautiful new addition to you kitchen.

Download the FREE kitchen island cart plans here!

Other Projects From DIY PETE
If you've enjoyed this project, be sure to check some other of these detailed build tutorials with plans. Cheers!