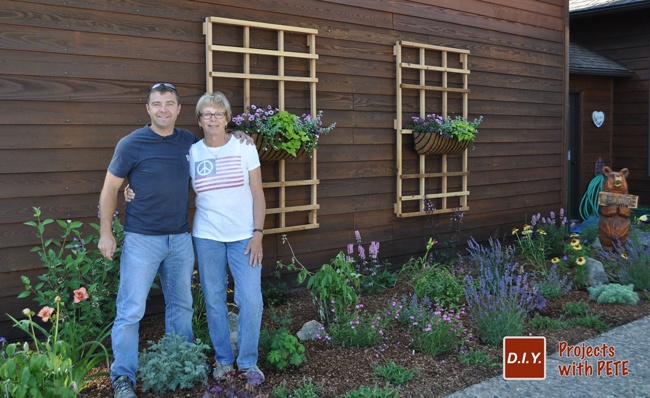
Learn how to build a Trellis with DIY Pete. This is a simple DIY project that will only take a couple hours and won’t break the bank. My mom and I created this project together and had a blast building this wood trellis.
Lumber for DIY Trellis
QTY: 8 2x2x8 boards (Actual measurement is 1 1/2 inches x 1 1/2 inches by 8 feet)
Cost: Cedar/Redwood: Approximately $6 per board or $48 in wood (in my town)
Cheaper Option: Pine: Approximately $2.00/board or $16 in wood (in my town)
You will want to stain or paint pine if used
1 Box of 2 1/2 inch screws
5 inch or 6 inch long screws (if fastening to home and using spacers)
Cut List:
4 boards: 72″ long
7 boards: 48″ long
Tools Needed:
Drill and Optional Impact Wrench
Square, Tape Measure, Pencil, Safety Glasses, Ear Protection
Step 1: Gather Supplies
Use the lumber list above. My mom and I used cedar wood for this project.
 Step 2: Measure and Mark
We cut the four vertical boards to 72″ long. We cut the seven horizontal boards to 48″ wide.
 Step 3: Cut the boards

Use a miter saw, circular saw, or hand saw to make your cuts.
Step 4: Sand

Sand the ends of each board to remove rough edges. This should be a very quick process. Don’t worry about sanding the entire board.
Step 5: Assemble Frame

Connect two 72 inch vertical boards with two 48 inch long horizontal boards.

Use two screws at each corner. Make sure to pre-drill to prevent the wood from splitting. I’d recommend 2 1/2 inch exterior grade screws. Attach the vertical boards to the horizontal boards from the backside to hide the screws.


We used cedar and are going to let the wood age and turn grey over time. You could stain or seal the wood if you’d prefer.

Have you built a cool project with your Mom, Dad, or family member lately? Or do you plan to build something with them soon? Please comment below and share photos, I’d love to hear about it!
