This post and episode is sponsored by our friends over at Maytag® . I received compensation and only partner with brands I truly believe in.
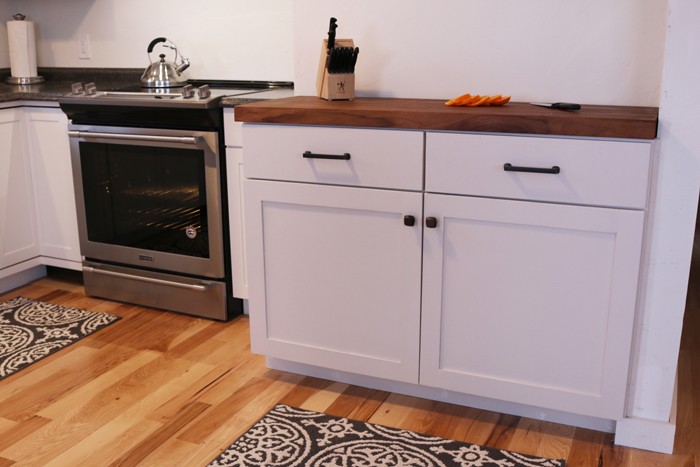
Have you ever thought about making your own kitchen cabinets? If so, I will fill you in on the basic steps involved to tackle the project! Building cabinets is a project you can tackle when you take one step at a time. The main steps involve building the cabinet carcass, making a face frame, creating doors and painting. For this kitchen project I’ve partnered with Maytag for the appliances. I’ve been using the brand for years without any problems and I absolutely love my new fingerprint resistant stainless steel kitchen suite. The appliances look sleek, are easy to clean and work perfectly. Plus, between renovations and kiddos running around, being able to minimize fingerprints from streaking our appliances has been a life saver.

Detailed video tutorial
Gather materials
Building cabinets is a doable project for anyone willing to take action and give it a shot. It does require a few additional special tools to get started and a positive can – do attitude.
Main Materials:
- ¾ inch 4x8 sheets of pre-finished plywood – This is very important because it will save you a lot of time. The interior of your cabinets will have a great looking sealant.
- 1x2 poplar boards
- 1x4 poplar boards
- 1/4 inch plywood
- 1x8 poplar board
- Butcher block boards (optional)
- Cabinet hardware
Main Tools:
Table saw and circular saw
Router and router table - 1/4 inch tongue and groove kit
Square
Pocket hole jig
Palm sander
Build the cabinet carcass
The cabinet carcass is the main part of the cabinet that encloses everything. Base cabinets generally come in a height of 34 ½ inches and are 24 inches in depth for the kitchen. There are many widths to choose from. There are also a number of spaces that will require a custom fit, which is why I chose to build my own kitchen cabinets.
The carcass is very easy to make and involves cutting plywood with a table saw or circular saw. The boards are attached to each other using pocket holes. Pocket holes are easy to make and you can use a simple Kreg Jig to make the process super quick and simple. Learning how to build cabinets is a lot to take in at first, but once you get if figured out you’ll be able to build whatever cabinets you might need!

Make the cabinet face frame
The face frame will attach to the front of the cabinet carcass. The face frame will go around the perimeter of the cabinet and may outline doors and drawers. Face frames are very commonly made out of boards that are ¾ inches thick by 1 ½ inches in width. Poplar wood is a very popular and an affordable wood choice for painted cabinets. The face frame is very simple and the boards are connected using wood glue and screws.

Connect the carcass to the face frame using the pocket hole screws.

Build drawers
The drawers consist of ¾ inch plywood boards and ¼ inch plywood for the base of the drawer. We used a router to cut a ¼ inch slot about a half-inch up from the bottom of the drawer. The plywood slides into the slot. If you do not have a router, you could simply glue and nail the plywood under the box instead of cutting a slot.

Add drawers
The drawers are installed by adding door slides. You will need a door slide for each side of each drawer.

Build doors
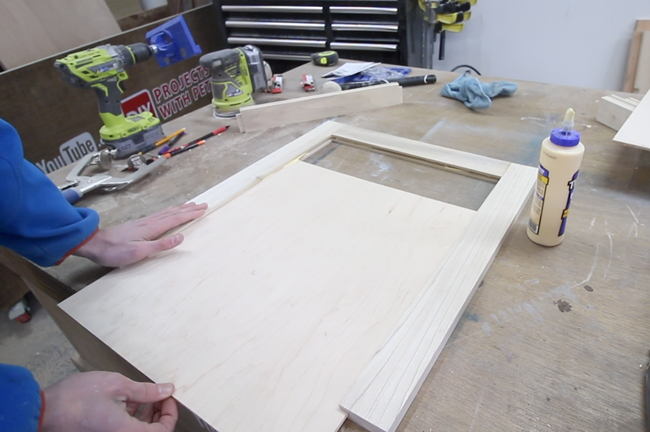
The doors are built out of 1x3 poplar and ¼ inch plywood. A slot is routed on the inside of each poplar board. The slot is what the door panel rests in.

Here is a photo of the ¼ inch plywood going into the groove.

Paint
Paint the cabinet doors. I chose to roll the paint on to avoid fumes and make the process simple. I used 2 coats of a water based primer. Sand the cabinets after the primer has completely dried. Next, apply 3-4 thin coats of cabinet paint. I used a water based cabinet paint from Valspar that had enamel in it.

Enjoy!
Enjoy your new kitchen cabinets! I hope this video gives you a good idea of the basic steps involved in building DIY kitchen cabinets. Please like and share if you enjoyed it! Don’t forget to check out the appliances from Maytag if you are looking to upgrade your kitchen’s look!


