If you've ever wondered about the process of how to build a backyard hockey rink, you've come to the right place. In this article I'll go through the steps I took to build a backyard hockey rink. We'll also talk about various methods to build a rink, common questions, and benefits of having a rink in your backyard! Making a rink is a lot of work, but in my experience it has been well worth it. The work has been “fun work” and I really enjoy being outside while creating something cool that will be used and enjoyed for years to come. I want to give a huge thank you to NiceRink for sponsoring this post. They are the maker of the boards, liner, and some of the rink accessories used in this project. Definitely check them out if you are interested in making a rink!
Benefits of building a backyard hockey rink
Before you think about building a backyard hockey rink, think about your reasoning behind doing so. Making an ice skating rink will take time and energy, but the benefits of having a rink will be well worth it. Here are some of the benefits I've already seen after a couple short months.
- Smiles… Backyard hockey rinks and ice rinks create smiles… Pure and simple. There is something about skating outside on a backyard rink or pond that is very special.
- You will have the coolest backyard on the block. Friends, family, and neighbors will love getting to skate on the rink.
- Everyone's hockey skills will improve dramatically. Ice time at the indoor rink is hard to come by. Having the ability to skate, play pickup games, and practice drills will quickly improve your skills and your children's.
- You'll inspire others to play hockey and to skate. I've had so many friends and family members over to the rink to skate for the first time. After a few hours of skating, they feel comfortable on the ice and can even dribble and shoot a hockey puck!
- Memories… The memories made over the winters on the backyard hockey rink are unforgettable. Your kids, the neighbors, and everyone who skates on the rink will never forget their experience out on the backyard rink.
- Your kids won't get bored and the Hockey Mom and Hockey Dad might just have some piece and quiet in the house for a bit while the kids deplete their energy out on the rink.
- Winters are long. This will help you get through it!
- Exercise! I am not a big fan of going to the gym or running on slick sidewalks and streets in the winter. Getting up early for a morning skating routine or simply getting together with some friends for pickup hockey is a tremendous way to stay in shape and burn calories quickly. I actually lose weight in the winter because of all the skating I do. It is the best!
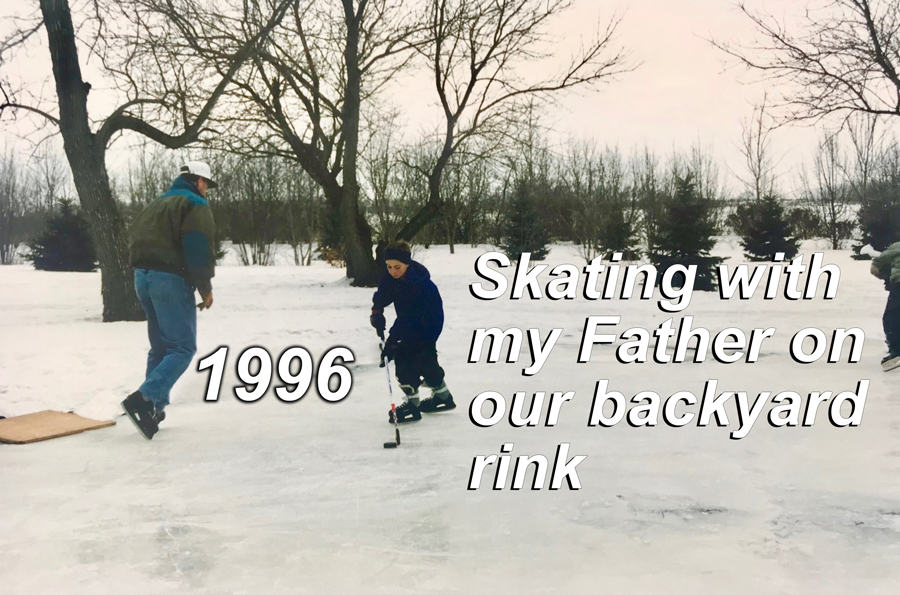
Those are just a few of the benefits of building a backyard rink. I'll never forget growing up and building a rink with my dad and brothers. We skated for hours and had so much fun. Please share in the comments below this post why you want to build a backyard rink, or about the memories you've had because of a friends rink!
Video of the process from start to finish
The rink my Dad and I used to build. We used a nice rink resurfacer and liner back in the day!
Downside of building a backyard hockey rink
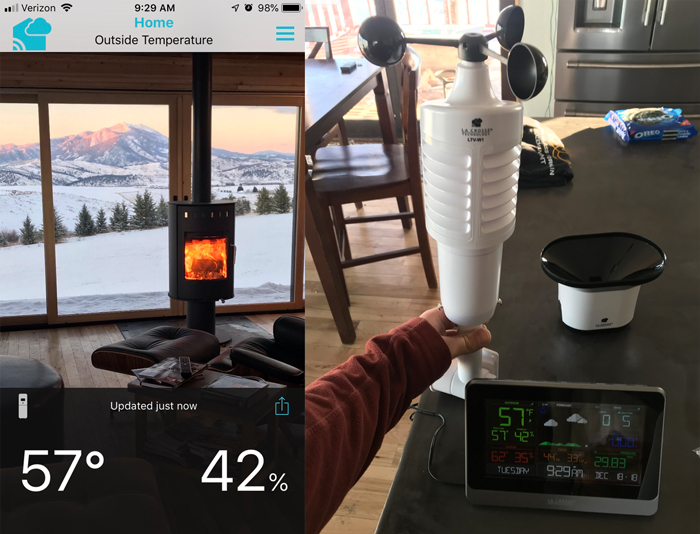
It should be mentioned that building a backyard hockey rink isn't all fun and games 🙂 It does take planning and work. You will stress about the warm days, temperatures, and precipitation. In fact, you will likely get obsessed with the weather and 10 day forecast. That's okay! I was at Costco the other day and picked up a weather station that I can monitor on my phone or computer from anywhere. Here is a similar weather station to the one I have.
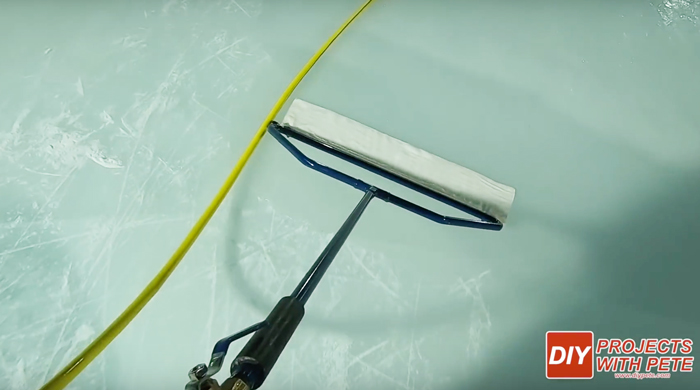
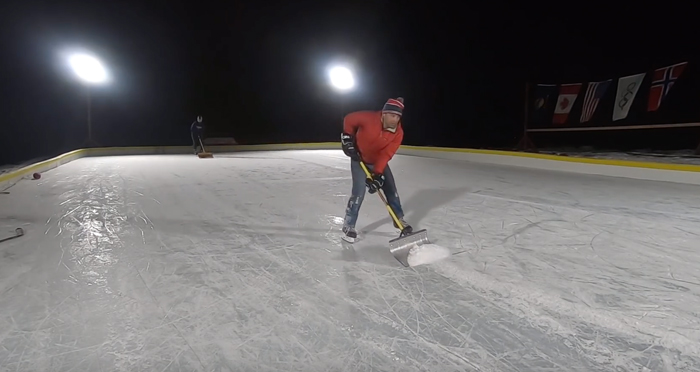
You will be doing a lot of shoveling to keep the rink and ice in tip top shape. Late nights or early morning will be spent out on the rink to give it a glass like finish for the next skating session. Trust me, it is all worth it. Here is a photo showing the ice being resurfaced or ” Zambonied “. I use a Nicerink 32″ Resurfacer and it works awesome.
Board Options
When it comes to boards for your rink, there are a few different options. The option you pick will depend on your level of ability in woodworking, your time, and budget. Please do your research and choose the best method that works for you. My goal with this post is to inform you of the options you have, and then to have you do whatever is the best fit.
Option 1: Complete DIY Rink
Many folks build their boards completely from scratch. This can be done by building brackets out of 2x4s and ripping plywood boards to the height of your choice. You could also use 2×10 boards or 2 x material instead of plywood. This will be the cheapest option and you'll be able to build a great rink. It will take the most time and require basic woodworking tools and your time.
Option 2: Plywood boards with durable plastic brackets
This is a great option if you want to save time by purchasing brackets. The brackets are super strong, easy to install, and maintenance free. You can rip plywood to the size you choose. NiceRink brackets work great for this method.
Option 3: High impact plastic boards and brackets
I recommend this option for those who are looking for the most durable, maintenance free, and professional looking backyard skating rink. The boards and brackets come ready to install, which means a huge time savings over building your own boards out of wood. The boards click together and can be installed in a few hours. This is the easiest and quickest way to build a rink. Plus, the plastic will never warp and will look great year after year. This maintenance free option will save you time and make the process as simple as it could be. Thus, it is the option that will be the biggest investment. I'm very happy with my choice to go with the NiceRink board system because of it's ease of setup, professional looks, and quality.
Figure out where you want to build your outdoor rink
Determine the best spot in your yard to build your outdoor hockey rink. No yards are perfectly flat, but if your yard has a slope of around 6-8 inches you will not need to level the area. Water will self level and fill the lowest areas first. If you have a six inch slope, you could have 4 inches of ice on the high side and 10 inches on the low side. This is perfectly fine. The more slope you have, the more water will be needed. You'll want to ensure your boards are tall enough or braced if you have more than a normal slope.
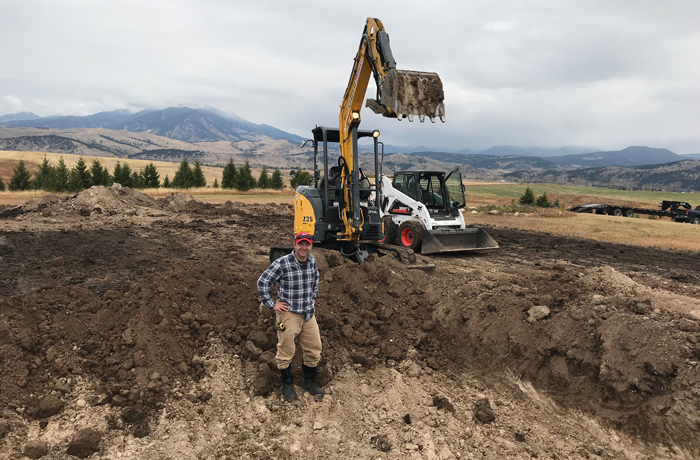
Level if necessary
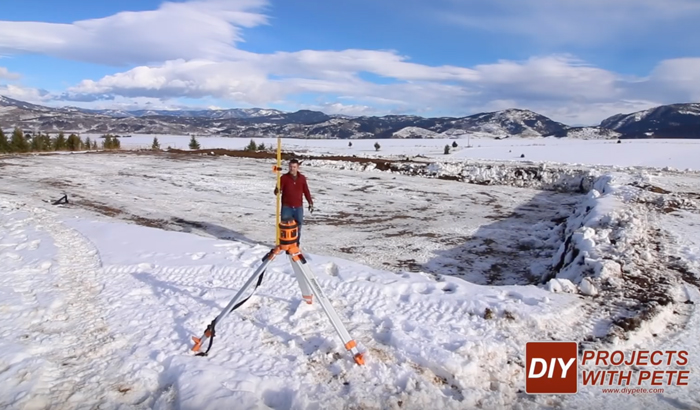
I live on a hill and had much more slope than most folks. I had a six foot difference from one end to the other over 88 feet. So, I had to rent equipment to level out the area. The mini excavator was $260 per day and is a digging machine. I borrowed the bobcat from my friend Josh, but they are typically around $200-$250 per day to rent. We were able to level the area in a weekend. We basically dug 3 feet down on the high side and used the dirt as fill to bring the low side up 3 feet and make the area level. We used a laser level during the process to dig and fill to the right depth. Laser levels can be rented for around $50 / day.
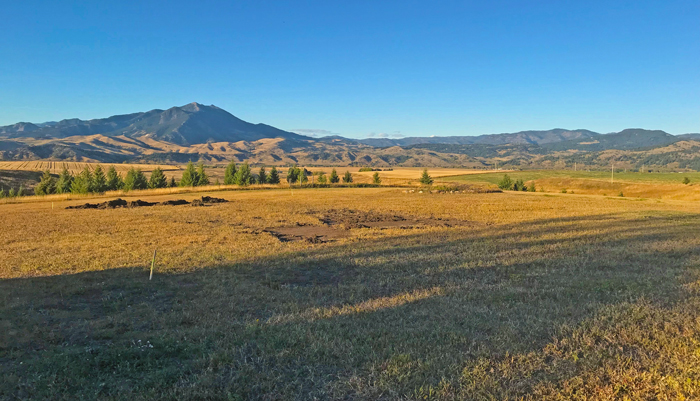
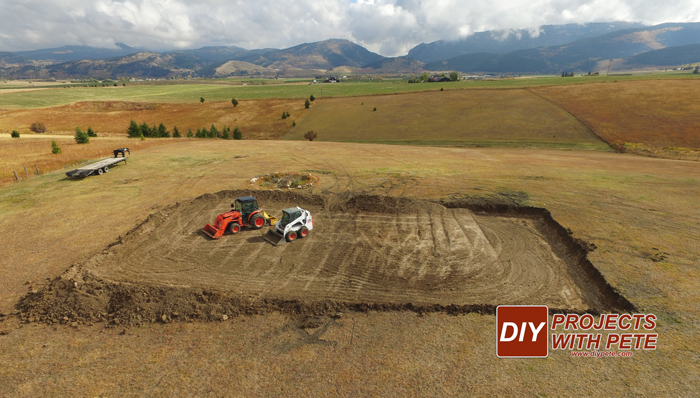
Here is a look at the area once it was leveled. I used the Bobcat to spread the dirt and do the initial leveling. A tractor with a box blade helped with the final touches of getting it level.
Here is the tool I used for leveling. The self leveling laser works great to get quick and accurate readings of your rink area. Mine wasn't perfect, but I got everything within about 6 inches when all was said and done.
This video shows the excavation and leveling overview in case you are interested.
Stake the area
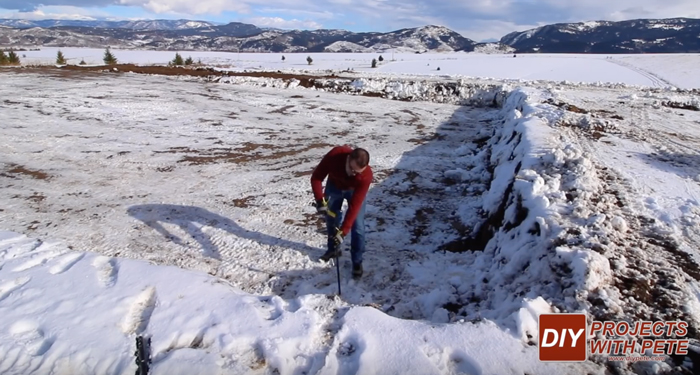
Once the prep work has been done, it's time to stake the area. Pound a stake in each corner with a sledge hammer. Use a tape reel to measure the distance between stakes.
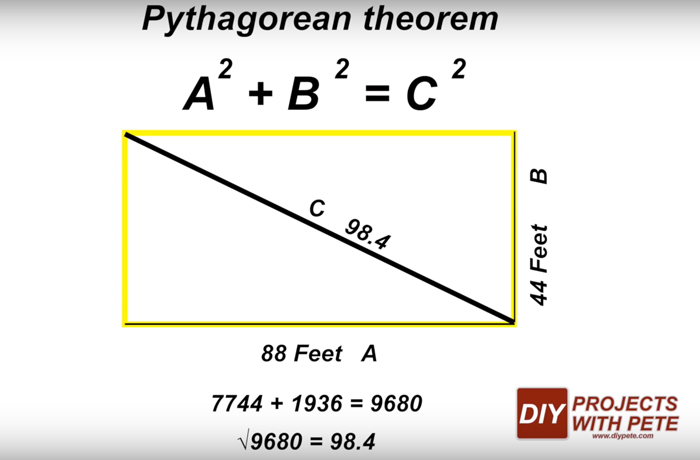
Once the stakes are lined up, plug your dimensions into a calculator to determine the distance it should be from one corner to the other. You'll want to do this from each corner to ensure your rink is square. My rink is 44 feet wide by 88 feet long and so my diagonal measurement is 98.4 feet.
String and spray paint
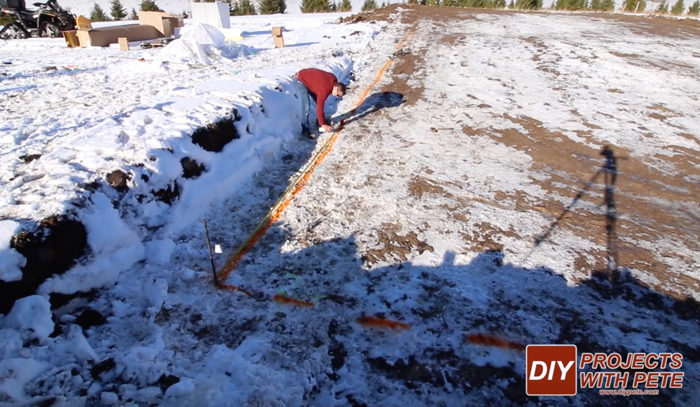
Tie string line around each stake to mark the rectangle. Next, use spray paint along the ground to help make it easier to line up the boards during installation.
Install boards
The Nicerink boards are very easy to install. I'd recommend checking out NiceRink's library of installation videos and learning section if you decide to go with the high impact plastic boards. You'll push the bracket into the ground and give it a couple hits with a mallet. Then snap the board into place. If the ground has already frozen, I'd recommend hacking off the two plastic spikes on the bottom of the bracket. Then use a short piece of rebar and pound it through the round hole in the center of the bracket.
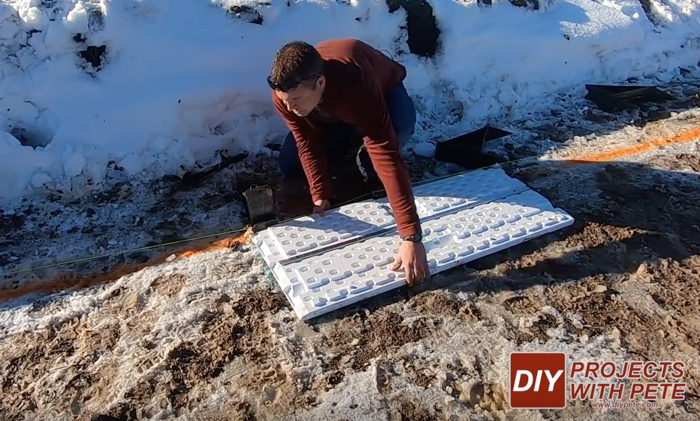
I'd highly recommend rounding the corners of your ice rink. The 4 foot straight sections make it simple to round the corners. They are not perfectly round like a real rink, but the puck will still wrap around the corners pretty well and are a huge improvement over a basic rectangular rink.

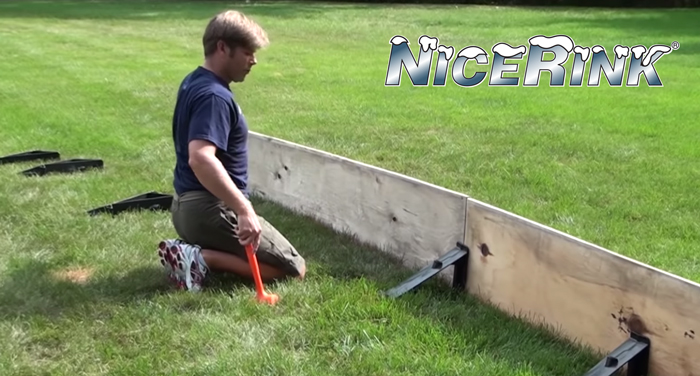
Jim Stoller is the owner of NiceRink which is a family owned business that started in Wisconsin in 1991. His company was the first to market with the plastic brackets and plastic boards. They are a great family and I've had the chance to get to know Jim and his son Tyler a bit over the last few months. They are fantastic people and their customer service and community of passionate hockey people are second to none. In this photo, Jim is showing how typical 3/4 inch plywood can be used with the brackets.
Once we figured out the process, the boards installed quickly. It took around 2 1/2 hours to install the boards and brackets for this 44 foot by 88 foot rink my first time.
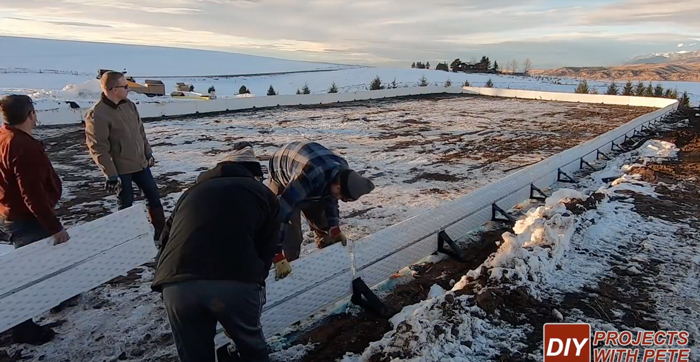
Install the rink liner
No matter what type of boards are used, a liner will be needed. The liner will be about 6 feet longer in length and width than the size of your actual rink. This way it will go up and over the boards so you have plenty of liner. Simply roll the liner out.
Once the liner is rolled out, pull it taut to get the wrinkles out. Get it somewhat snug against the boards and then drape it over them. Excess can be cut and removed once the rink has filled with water.
Fill your backyard hockey rink with water
You'll want to research and determine the best way to fill your rink. Most people use a basic garden hose hooked up to a home. If you are on city water, your bill will go up for the month, but it will most likely only be an extra $100-200. I have a well and was concerned about the amount of water in it and putting additional stress on the pump. After talking with a number of people, I decided to use my well and it worked just fine. Use an ice rink water calculator to determine the amount of water you will need. I found out it was going to take me about 18,000 gallons of water. Crazy!
The other option is to hire a water truck service or to look into making a donation to your local fire station. Sometimes a fire station could fill their truck with a few thousand gallons and make trips during a morning when they are not busy. A water truck is a great option and will most likely cost you around $400-$800 depending on your rink size and the tank size available. Try to find a truck with a larger tank because you'll normally pay by the hour. So the fewer trips to refill on water, the faster the process will be. This is by far the quickest way to fill a hockey rink or pool!
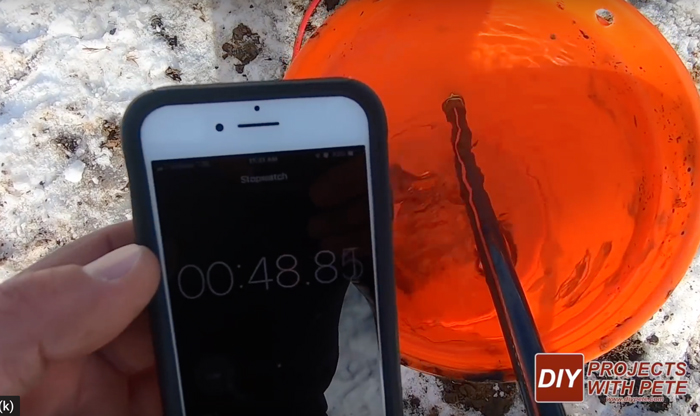
You can calculate your water flow rate by timing how long it takes to fill a five gallon bucket with the hose. It took just under a minute to fill the bucket and averaged between 5-7 gallons per minute after a few tests.
Put the hose in and start filling 🙂 I calculated it would take about 2 1/2 days to fill.
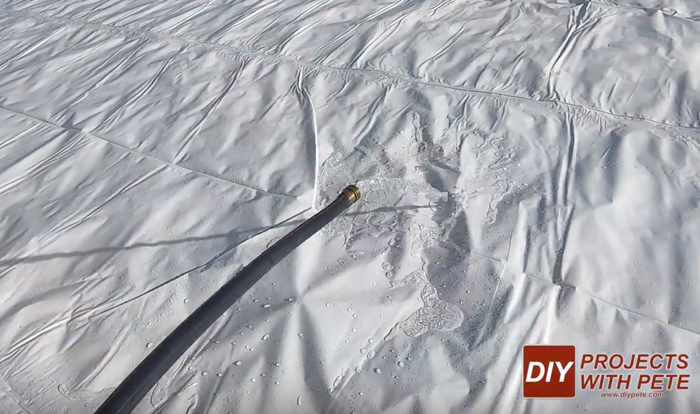
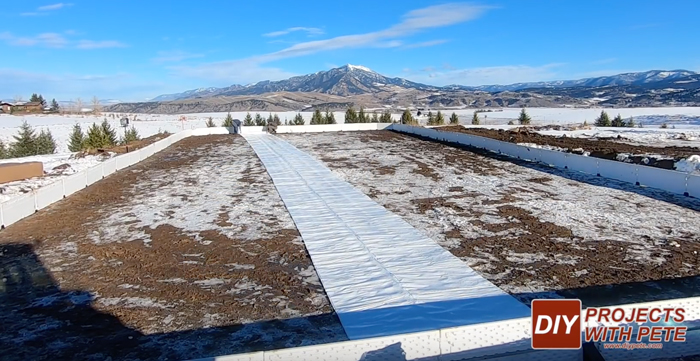
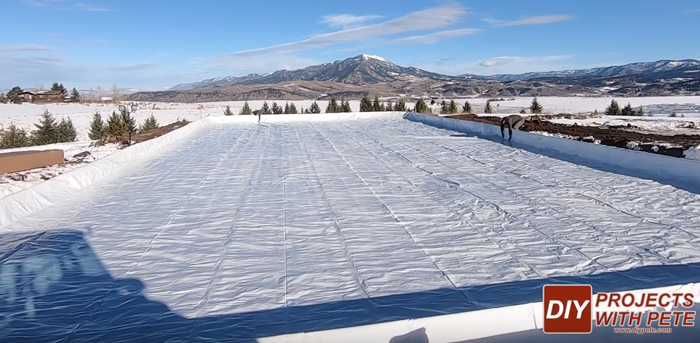
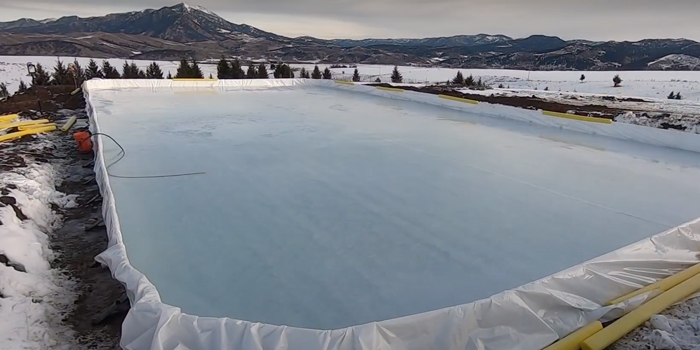
This is what the rink looked like after 24 hours of filling it with water. The water will fill the lowest areas first. I temporarily installed a few of the yellow bumpers along the top of the boards to hold the liner in place while filling.
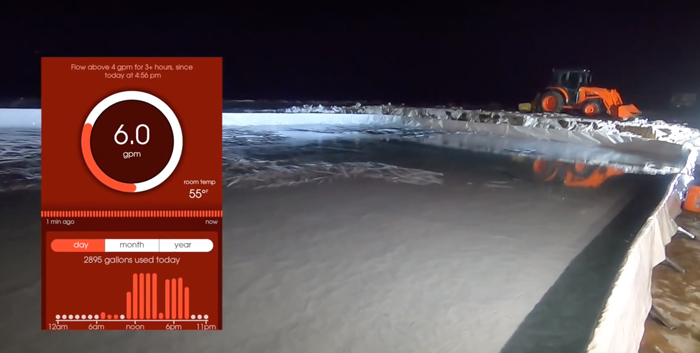
I have a Streamlabs home water monitor that tracks how much water is used on a daily basis and the current flow rate. It's main purpose is to alert me if there is a leak in a pipe in my home. I also found it was very convenient to have when filling my rink! I could get an accurate reading of how much water was used and the flow rate at any given time from an app on my smartphone.
Install kick plates and bumpers
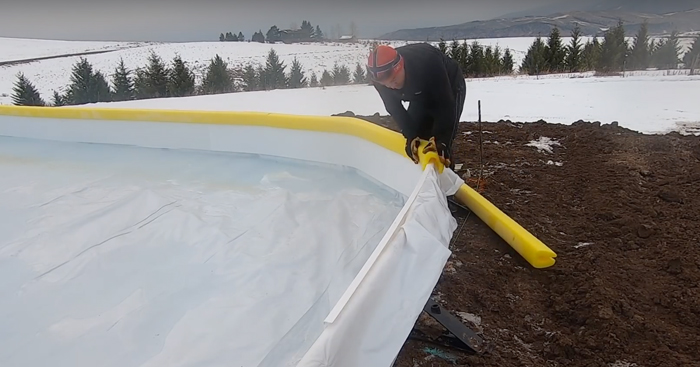
I installed the kick plates and yellow bumpers once the water covered the entire liner and before the water started to freeze. The purpose of the plastic kick plates is to protect the liner from getting rips from skates, stick blades, shovels, and pucks. It also makes the puck bounce off the boards better and gives the rink a more professional look. It has a lip that simply rests on the top of the boards. The yellow bumper goes over the kick plate, boards, and liner to hold everything in place.

The kick plates and bumpers come in 8 feet lengths. They are flexible and can go around the corners just as easily as the straight sides.
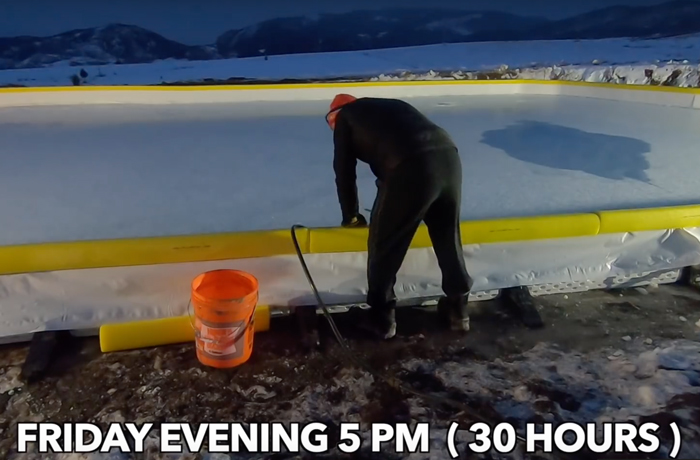
Cut the last bumper to fit with a razor blade. Then let the rink keep filling! This is what the rink looked like after 30 hours of filling.
Mother nature brought a couple inches of snow late Friday evening and formed a slush on the top of the ice. It gave the ice a more cloudy appearance, except for the area where the hose was filling the rink. If it wouldn't have snowed, the whole rink would have frozen crystal clear and you could have seen the liner through the ice. I can still see the liner in the area the hose was though. I was a little bummed about this happening, but it wouldn't have lasted that long anyways, since a warm day would eventually create slush and cloud up the color.
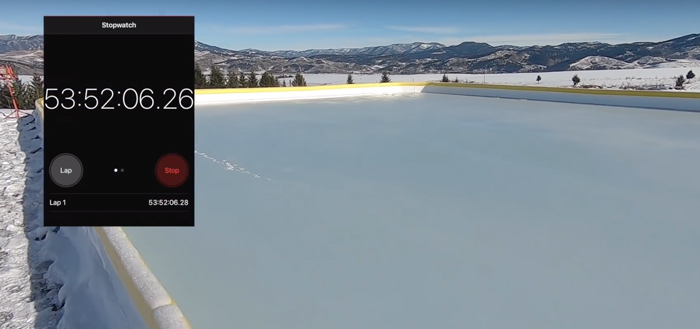
It took just under 54 hours to fill the rink or 2 days and 6 hours.
Let the water freeze
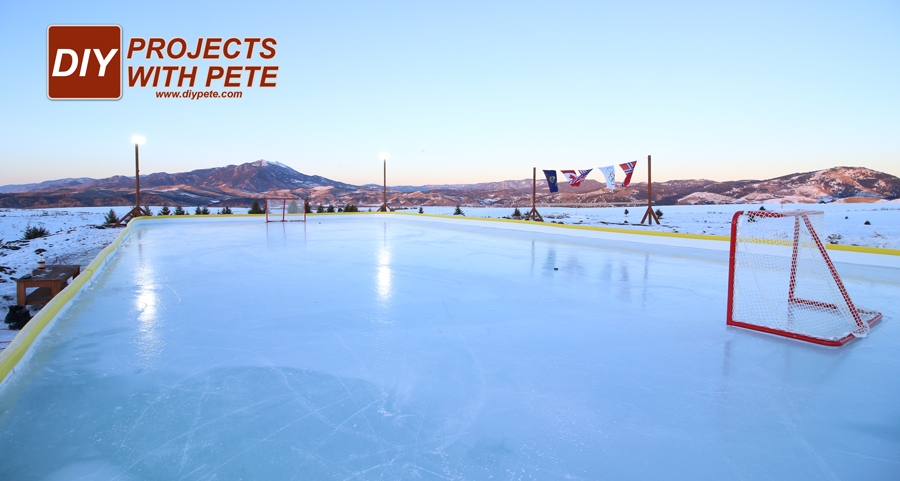
Give the rink plenty of time to freeze. The daytime highs were about 15-20 degrees in late November when I filled the rink. The rink completed filling Saturday at 11am. I was able to walk on the rink Wednesday morning, and skate on it Wednesday evening.
Accessorize your rink!
While waiting for the water to freeze, start working on other projects for the rink.
Build light posts
I started by building light posts. The ground was pretty frozen so I built light posts that will rest above ground. I couldn't find any tutorials on doing this, so I came up with my own idea. Here is some info in case you'd like to build something similar.
Materials:
Qty 1: 4×4 x 14 foot long treated post – $26
Qty 1: 4×4 x 10 foot long treated post – $16
Qty 2: 4×4 x 8 foot long treated post – $11 each ( $22 total )
Total wood cost per post: $64
Other supplies:
Screws: 5 inch long torq screws
Cable fastener clips
Overview of the process:
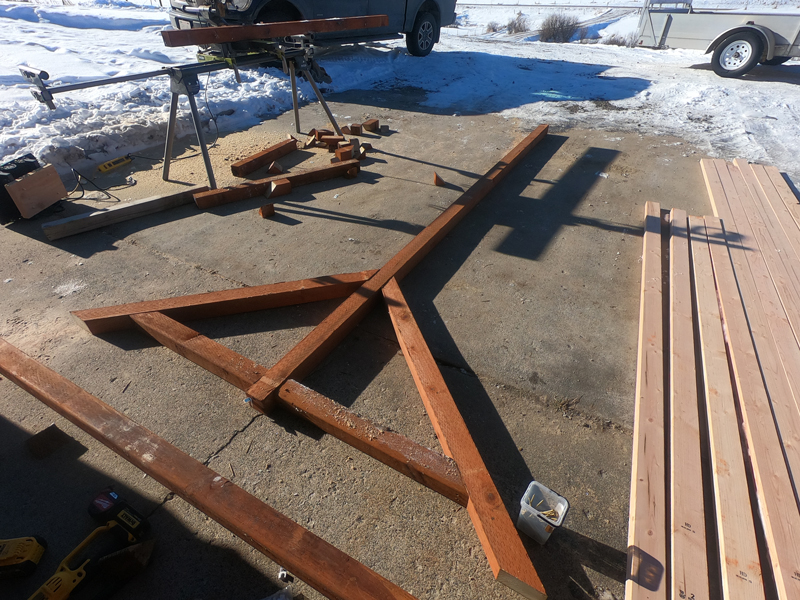
- Lay the 14 foot board flat on the ground.
- Cut the first two diagonal supports out of the 10 foot 4×4. Cut at 45 degree angles on each end. They should be about 58 inches from point to point.
- Cut the short horizontal supports out of one of the 4x4x8 boards. Cut a 45 degree angle on only one side of the board. They will be about 20 inches or so from the square end to the point.
- Attach all the boards to each other with 5 inch long screws.
- Cut 2 additional diagonal supports at 45 degrees on each end out the other 4x4x8 board. They should be about 47 inches from point to point.
- Flip the post upwards and have someone hold it straight. Attach the two diagonal supports. The supports should be flush with the ground.
- Attach the other shorter horizontal support boards.
- Cut a small block from scrap 4×4. It should have a 30 degree angle on one end and be flat on the other. This will angle the light down.
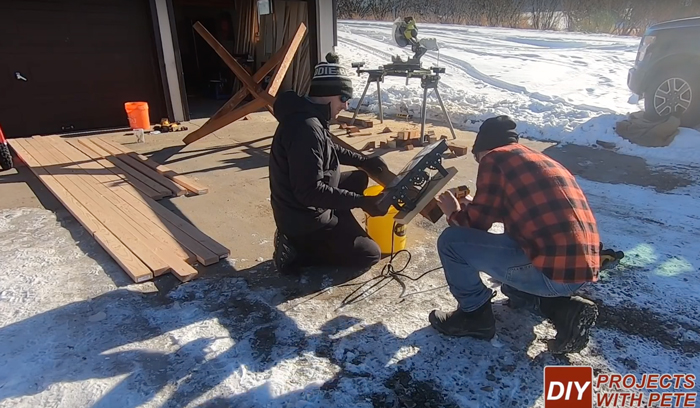
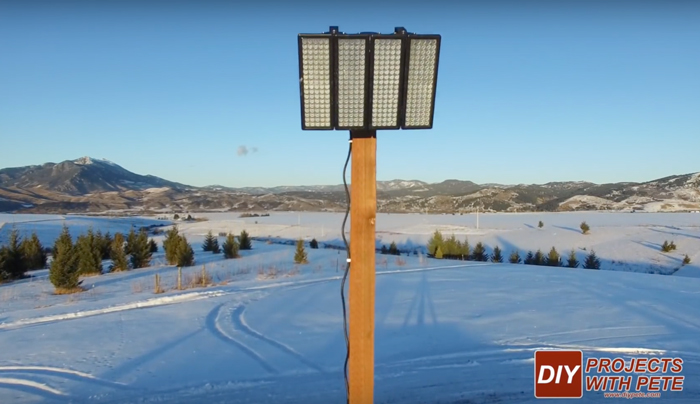
- I attached the 400 watt 40,000 lumen LED light and brackets to a 2×10 board cut to 15 inches. I then attached it to the post. The LED light I ordered works awesome, but it did require some wiring. I used wire nuts to connect each of the LED panels, and then wired that to a 3 prong plugin. It took about 30 minutes to assemble and wire each light. One light consists of 4 little panels. If you haven't wired before, I'd recommend having a friend help out. If you have additional questions about how these were built please let me know in the comments.
- I'd recommend using screw eyes in the post and running cabling to a stake in the ground to prevent them from ever blowing down if there were a storm with very high winds. Another option is to drill 1/2 inch holes through the diagonal supports at an inward angle, and then to pound rebar or stakes through it an an inward angle and into the ground.
Assembling the light to the 30 degree angled piece.
The 400 Watt LED in action.
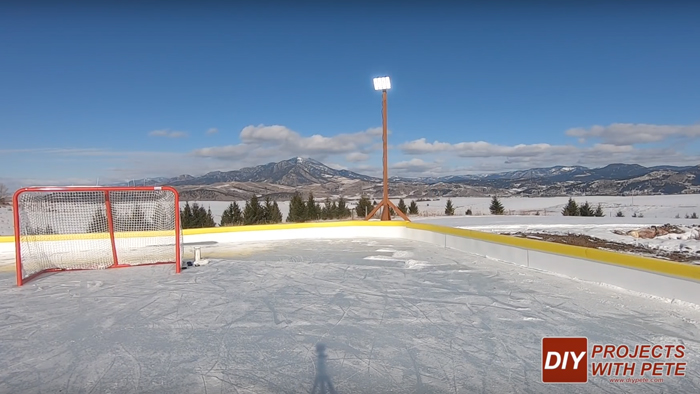
I secured the cable to the 4×4 with cable clips.
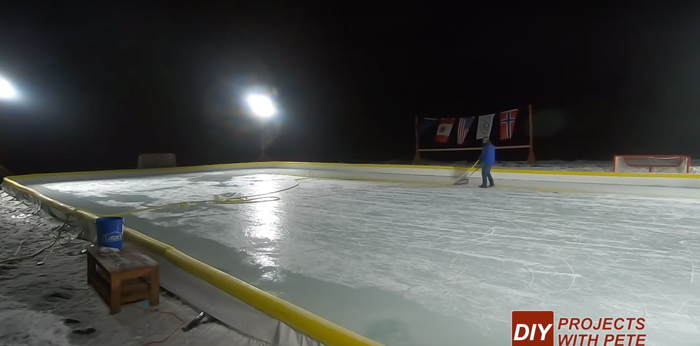
As you can see, these four lights have plenty of power and make it look like daytime!
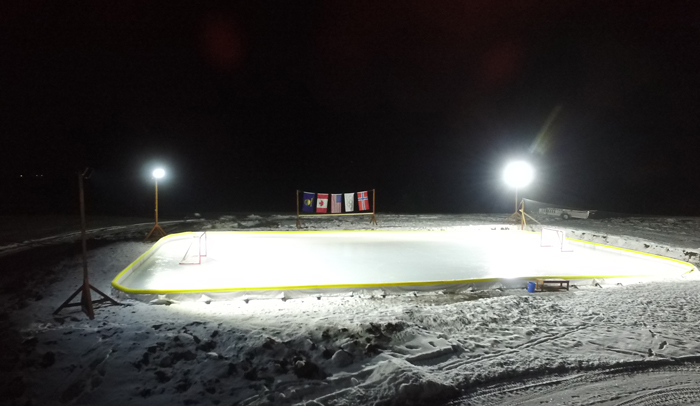
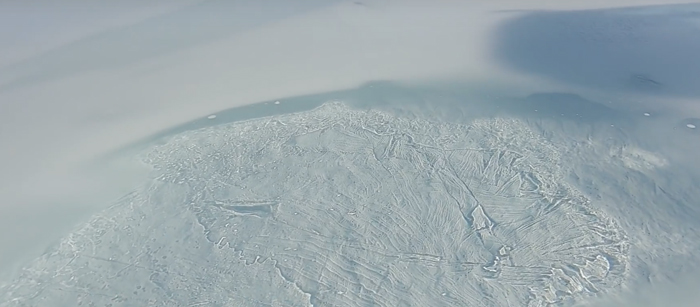
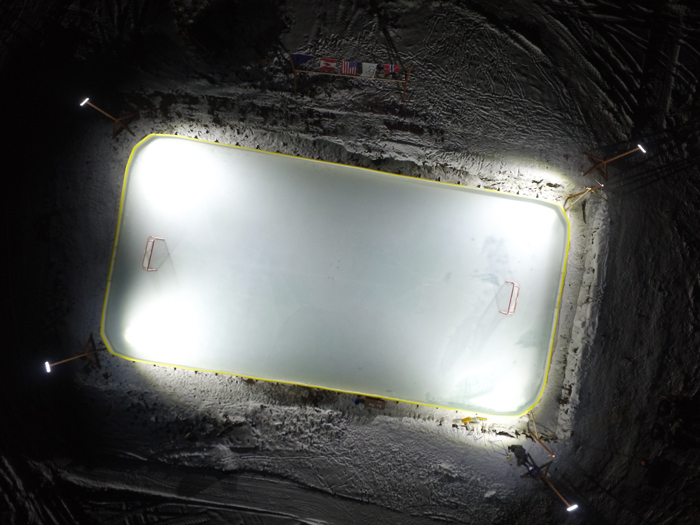
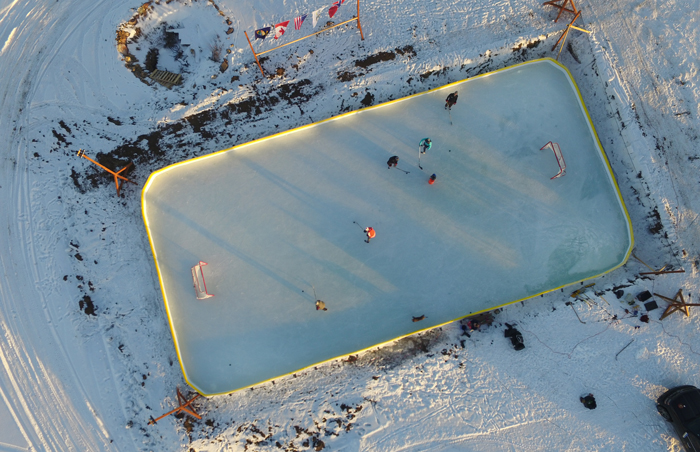
Drone shot of the rink with four LED lights on 14 foot poles.
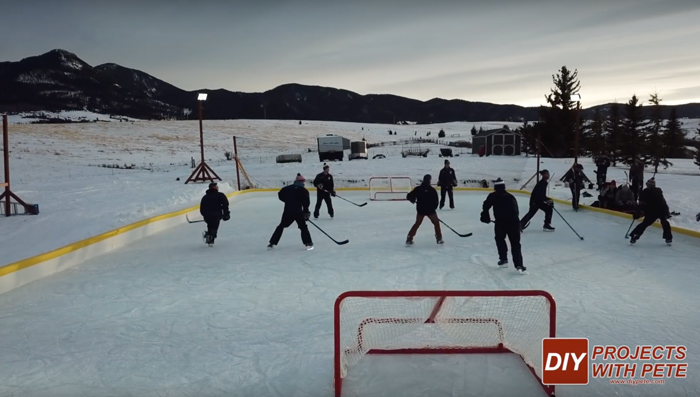
Start skating!
Call over some friends and family or get those kids out on the ice! Have fun and enjoy your rink.
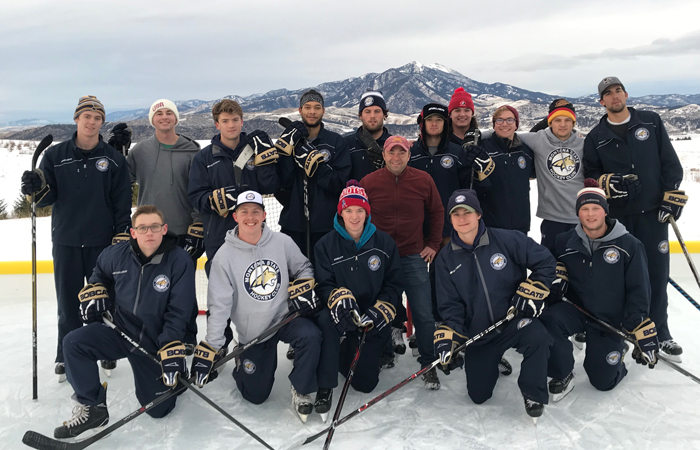
The MSU Bobcat hockey team stopped over after their finals tests were complete to relax and have a little fun. They played 3 on 3 and the rink worked perfect.
Thanks to Orion Herman for making a cool video of their skating experience on the rink!
Maintaining your rink
It's important to stay on top of everything to make sure your rink is in peak shape. After a night of skating, you'll see that you've created snow shavings that turn into a light layer of snow on your rink. If it builds up too much during a game it will be harder to puck handle, so we'll take a short intermission and shovel the rink.
You'll also want to shovel the rink well before you resurface the ice. Get as much snow off as possible so you have a nice smooth sheet of ice after resurfacing. I'd recommend getting wider shovels than what we are using in this photo to make the process go faster.
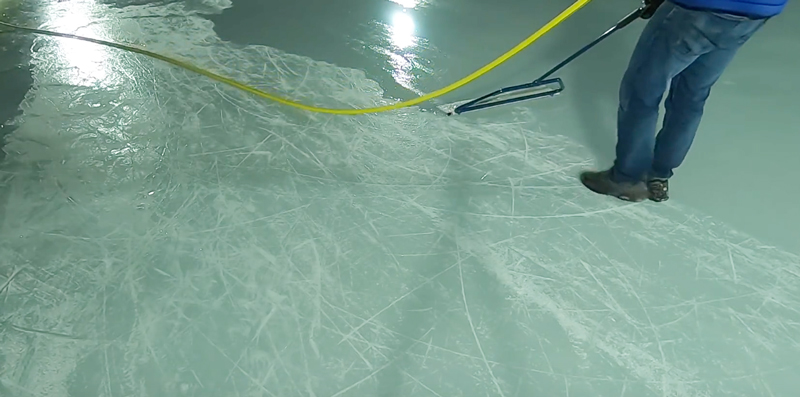
Once the ice has been shoveled, I use a resurfacer to essentially Zamboni the rink. This device hooks up to a hose and disperses the water. There are a bunch of small holes where the water comes out. A “towel like mat” evenly spreads the water.
A real Zamboni is very similar but has one extra function. A real Zamboni has a blade underneath that scrapes the ice and then the machine collects all the snow. I essentially do the blade function with a shovel, but do not actually cut into the ice. The Zamboni then disperses water to create a thin layer of ice similar to what a resurfacer will do. This resurfacer is 32 inches in width and it takes about 15 minutes to resurface my 44×88 foot ice rink.
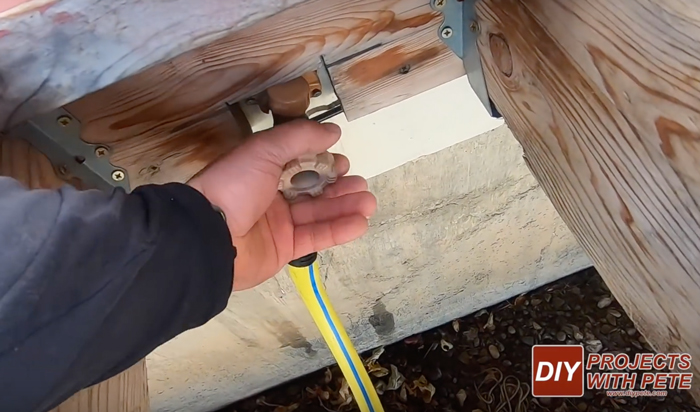
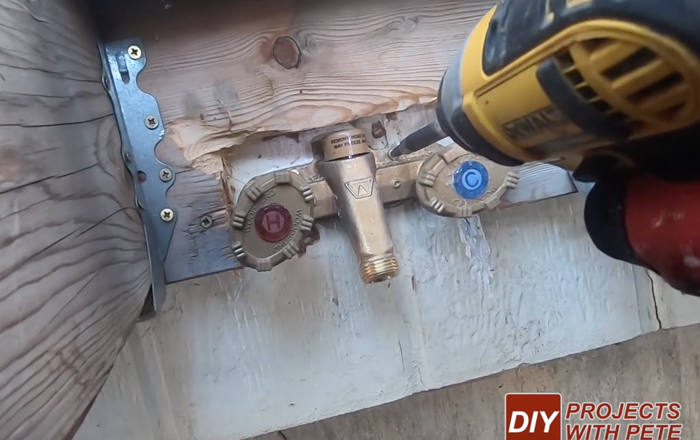
One of the best pieces of advice I got was to use hot water for the resurfacing process. This way, the water will help melt the top layer a bit and give you the smoothest surface possible. It also helps in preventing water in a hose from freezing on an extremely cold day if you get a phone call or need to take a break during resurfacing your rink. The valves of this faucet are about 12 inches in so they'll stay warm in your house and won't freeze. I have a Woodford water faucet with Pex connectors.
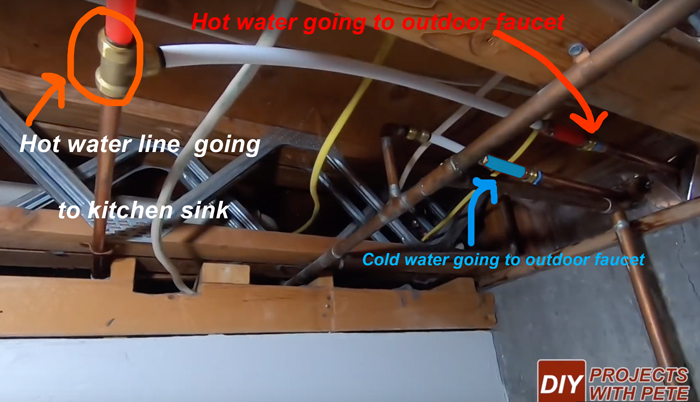
I basically found a hot water line and split from the copper with a T. I used the shark connectors which makes it easy to convert a copper line to Pex. I then used the existing cold water line but ran new Pex pipe to it. This project took me about 3 hours but was well worth it! Working with Pex piping is pretty straight forward.
Another option is to use a portable hot water heater that connects to a propane tank. I am seriously going to consider this option next year. Right now, I have a cart that lugs around about 200 feet of hose. My plan is to pipe a water line underground to the rink this summer, and to install a frost proof yard hydrant. This will make it so I only need to use a small amount of hose. The water will be heated with the portable water heater.
In summary, building a backyard hockey rink has been well worth it. I've learned so much and the rink has already helped create memories for so many people. The work has been fun and I've learned a lot about building and maintaining a rink. When I've had questions, I've gone to the many resources available. NiceRink has a Facebook community where I've learned a lot of the tips that have helped with my rink. I hope this post helps provide tips and inspiration to get you going with a hockey rink project! Please share what you've learned below. Cheers! – Pete