Year 3: DIY outdoor hockey rink dialing in and facing the weather
Thanks for stopping by DIY Projects with Pete and checking out our awesome DIY outdoor hockey rink! I’m excited to share this year’s start-to-finish video and tutorial about Year 3 of building an awesome rink.
I’ll go over all sorts of information about building your own backyard rink, with tips and tricks that I’ve learned over the last couple years. From ice resurfacing and my favorite snowblower, to accessories like lights, flags, and music.
The 60 x 120 foot outdoor rink sure was a lot of work, but it was definitely worth it. I get to inspire others and share the rink with lots of friends and family for hours of fun memories and smiles 🙂
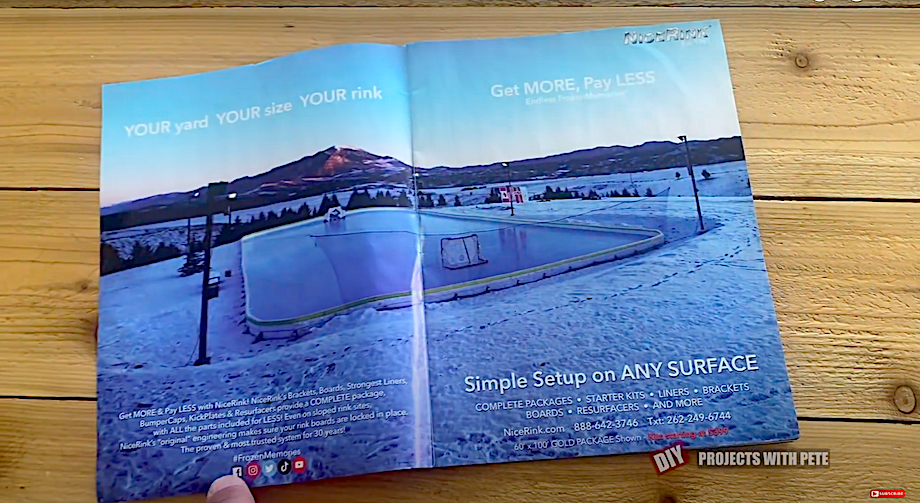
At an elevation of 5,285 feet in the foothills of the Rocky Mountains, there’s a lot of unpredictable weather and other challenges, but there’s also an amazing view. This year, our DIY outdoor hockey rink was featured in a full spread for Nice Rink in USA Hockey Magazine! (Nov/Dec 2020 issue)
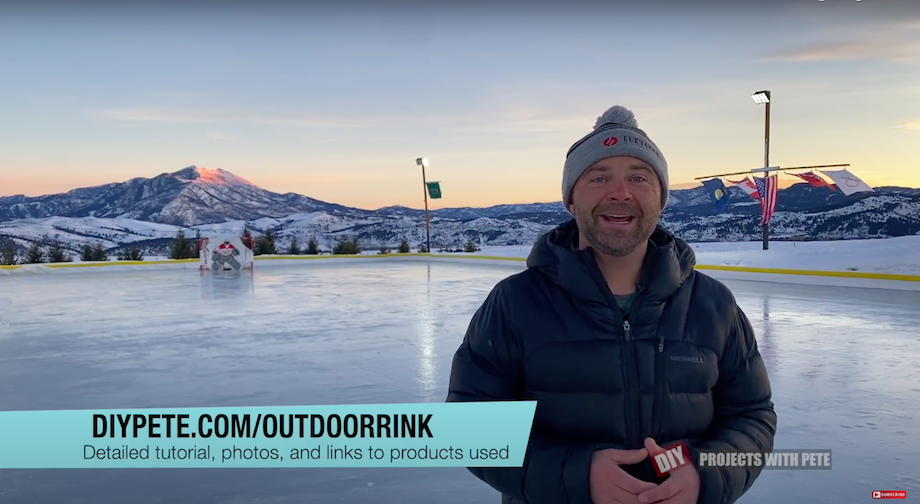
DIY Outdoor Hockey Rink Tutorial table of contents:
- Reasons to build a DIY outdoor hockey outdoor rink
- Review of the last three seasons
- Overview of the basic steps to build a rink
- A detailed run through of all the steps
- Ice resurfacing options
- Shovel options
- Snowblower options
- Other tips and things to look out for
- Year-end teardown
- Other DIY outdoor hockey rink resources

Reasons to build a DIY outdoor hockey rink
- Fun memories to share with your family and friends. You'll have hours of skating and playing, as well as building the rink and shoveling, etc.—building character, too!
- Exercise. Ice skating is a really fun way to exercise and you won't even realize all the calories you're burning. Time flies when you're skating!
- Learning and practicing your ice skating and hockey skills. Ice time at the local indoor rink only comes a few times a week. But with your own rink, you can keep improving your skills and fundamentals as much as you want.
- Inspire others to play hockey and get comfortable on ice skates. After only a few hours, your friends can usually get the hang of it and start playing in your pick-up games.
- Ice skating is a great activity for kids. They'll quickly improve their skills and also use a lot of energy—so they'll sleep well at night!
- You'll have the coolest backyard on the block! Your friends, family, and neighbors will all want to hang out more. And hopefully help out with some of the maintenance and share some rink-side snacks and drinks!
Review of the last three hockey seasons
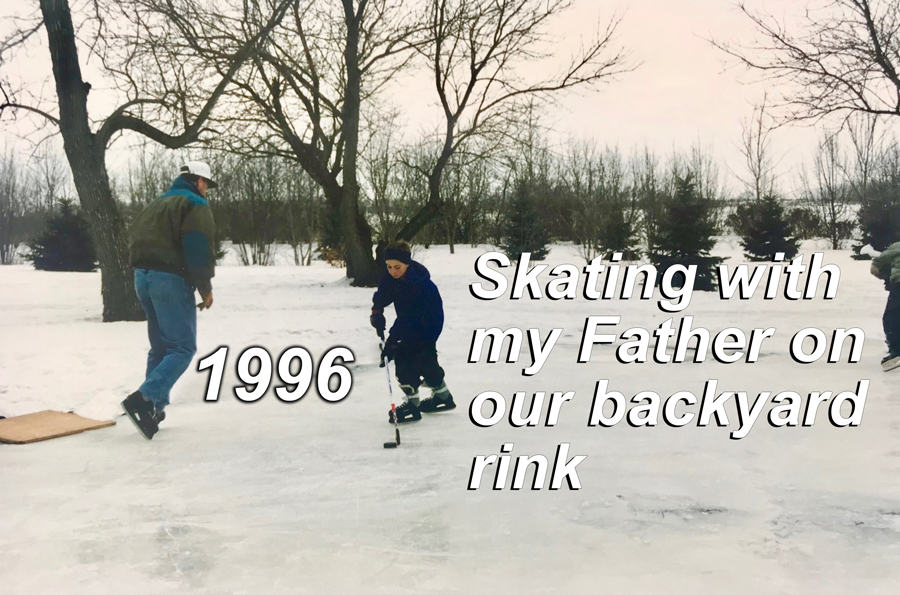
After three years of building my own DIY outdoor hockey rink, I've learned a lot! I grew up building a rink in our backyard with my dad and brothers every year, so I knew what I was getting into, but doing it myself was a whole new ballgame.

One really neat tradition that we've started is to save a jar of water from the rink when it melts at the end of the year, and add it to the ice of next year's rink!
Year 1: level the ground
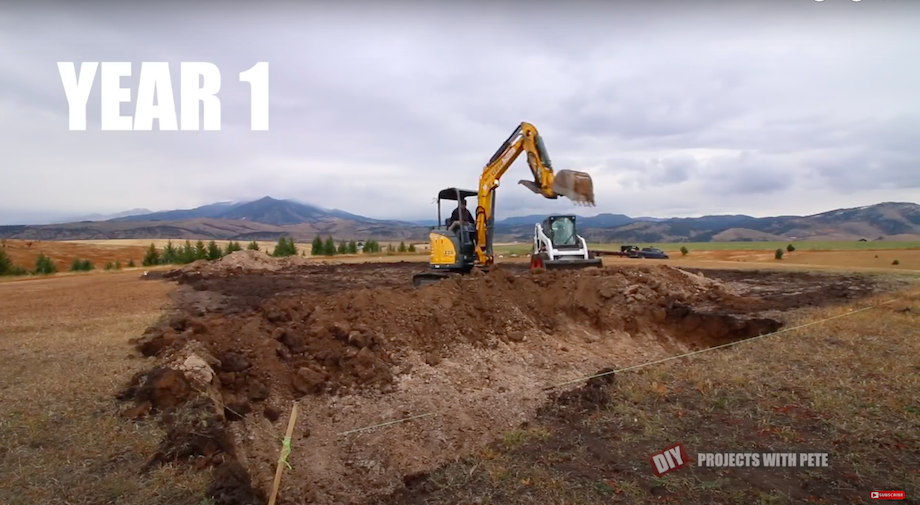
Year 1 was about just getting started and learning, and most importantly, leveling the ground. I started with a size of 44 by 88 feet, and had to level the ground quite a bit.
In the foothills of the Rockies, my property is on a rolling hill, and the best place for a hockey rink had about a six foot differential from end to end.
I rented and borrowed a combination of equipment to basically remove 3 feet of dirt from one end and add it to the other end. After a weekend of hard work and diesel fuel, the full rink was pretty darn level, within a few inches at least.

Year 2: make it bigger, level some more
Year 2 upped the ante by increasing the size and amenities. The size of my DIY outdoor hockey rink increased from 44 x 88 feet to 60 x 120 feet. The bigger size required another round of heavy equipment to level the playing field.
For reference, a standard NHL hockey rink is 85 x 200 feet, and Olympic size is 98.4 x 197 feet (an even 30 x 60 metric meters). There's an image of rink sizes a little further down.
Renting a skid steer and/or small excavator will run you $200-300/day per unit, so you'll want to plan a long day to get as much done as you can.
Or you might get lucky by having a friend with that type of equipment. A tractor with a loader and a box blade can go a long way too.
We also used a laser level to help with the leveling process and I would highly recommend renting one for the day, usually around $50/day. The video above shows the full leveling process.
Year 3: dialing it in
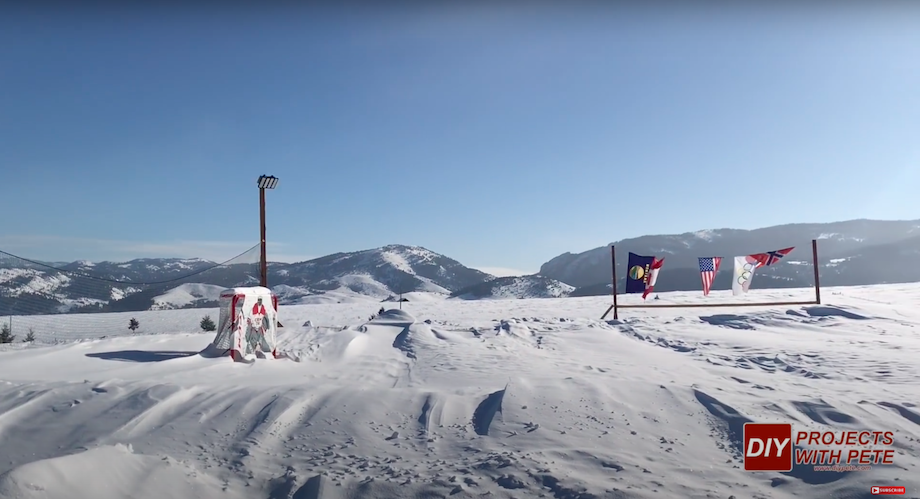
Year 3 was all about dialing in the rink... and battling the weather. We had a lot of maintenance and troubleshooting to do because of the unpredictable weather, including both warm and cold days, snow, and 60 mph winds.
At the initial filling and freezing of the rink, an unexpected snow system came in and caused a bumpy, ridge-filled ice surface that took a lot of reckoning to get smooth.
A combination of "bucket dumps," a propane weed torch, and just skating on the rink finally got it to a good place (I'll talk more about these troubleshooting methods below).
Throughout the season, snow and wind created hard drifts along the edges of the rink that were really difficult to clear out and required a serious snowblower. I'll also talk more about snowblowers below.

During the summer before year 3, I trenched out electrical power for the lights and music. We planted grass that started to grow and made a great field for football, soccer, frisbee, and Spike ball during the summer.
Year 4: snow control and a warming house
You bet I have plans for year 4 already! For starters, some strategic snow fencing. Snow fences are those orange holey fences, kind of like a big version of bright plastic chicken wire. They are useful because when the wind blows, the snow drifts around the fences—and hopefully not on the hockey rink!
I also want to build a warming house. We've had a fireplace and benches, and sometimes bring in an enclosed equipment trailer for big days like on New Years Eve, but I would like a more permanent structure.

A warming house is nice to warm up in of course, but it'd also be a great place to keep all the extra gear. When you have your own DIY backyard hockey rink, you end up collecting lots of skates, sticks, gloves, and shovels!
Overview of the basic steps to build a DIY outdoor hockey rink
I will go into plenty more detail on each of these steps, but just a quick overview of the process here:
- Choose the best area and size for your rink
- Level the ground if necessary
- Stake, string, and spray paint the outline
- Install boards and brackets
- Add liner and pull taut
- Fill with water (lots of it!)
- Add kick plates and bumpers to your boards (if you choose to)
- Let it freeze—and hope for cold, clear weather!
- Troubleshoot bumps and ridges
- Shovel and resurface as necessary
- Add hockey goals and a 'shooter tutor'
- Hang lights for night skating on posts or nearby trees
- Hang a net to catch pucks
- Accessorize with flags, fire, benches, and music
- Invite your friends over and drop the puck!

Choose the best area and size for your DIY outdoor hockey rink
First thing you'll need to figure out is exactly where to put your outdoor rink, and what size it will be. You'll need a big open space and the flatter the better.
I'd aim for variation of not much more than 6 inches across the area for the rink.
Water is self-leveling, so we've got that going for us, but that means that if there is a hill, the water will be very deep on the lower side.
Deeper water means it will require more water, take longer to freeze, and your boards will end up being very short, so your pucks go flying out more.
Hopefully your yard will work, but if not, you can rent some equipment and level it yourself.

A lot of people ask me why I don't build a full-size outdoor rink, and there are a few reasons.
It's a lot of maintenance and snow removal to work on already at its current size. It takes more resources to build bigger: more boards and materials, more water, more lights, etc.
But the best reason is because a smaller size rink is perfect for smaller pickup games and 3-on-3 hockey. If it were a full-size rink, you'd get tired real quick without a full team! (5-on-5 plus goalies.)

This is a screenshot from the Outdoor Rink Heaven instagram feed (@odrheaven)
This is where looking at other peoples' rinks can really help for inspiration. Some folks set up boards on an actual lake, some rinks are nestled in a fenced in yard.
Backyard Ice Rinks and their Facebook group, and Outdoor Rink Heaven's Instagram feed have pictures of DIY backyard ice rinks from all over the frozen world.
These websites also have great communities willing to help out with ideas and share what has worked and has not worked. In addition to rink placement, they're great resources for other building tips, ice resurfacing, and tons more.

Level the ground if necessary
If you think you might need to level your ground, a laser level is the right tool for the job. I walk through the process in the leveling video a little further up in the post, under the Year 2 heading.
Basically, you set the main part on the ground nearby, then walk around with the other part that beeps when it's level with the main part. In the picture above, we're finding the high spots and marking them with spray paint, so we can flatten them out.

Stake, string, and spray paint the outline
For this part, you'll want a long measuring tape roll to measure out all the sides of the rink, and then square them up by measuring the diagonal.
I recommend using a little math to get it just right—Pythagorean's Theorem can help you calculate what the diagonal measurement should be to make the corner angles perfectly 90 degrees.
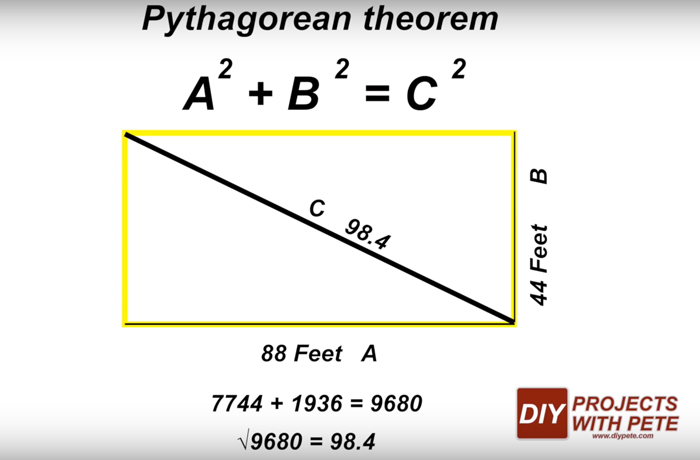
For my Year 1 rink that was 44 x 88 feet, the diagonal is 98.4 feet.
If you're a little rusty with all the math symbols, just google "Pythagorean theorem calculator" and you should be able to easily plug in your basic measurements.
Alternatively, you can just measure each diagonal and get them to be the same... but that will require a lot of back and forth measuring and tweaking, so I really recommend doing the math.
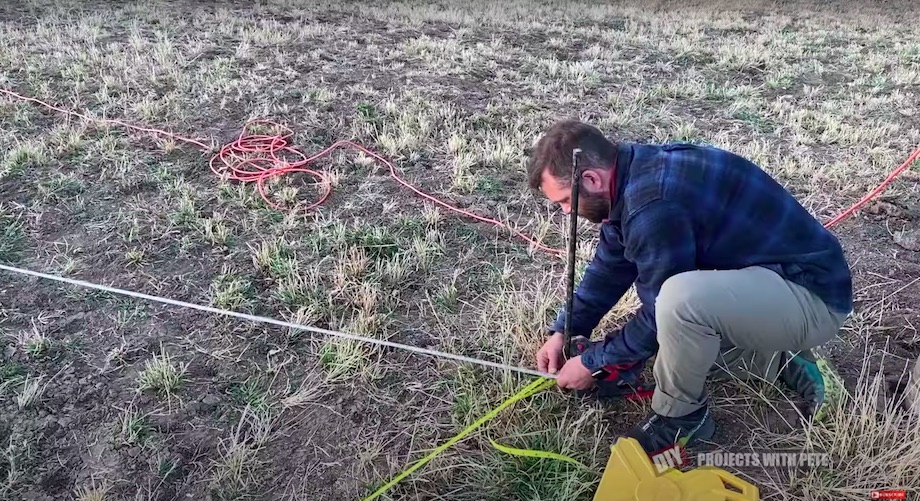
Once you get four corner points that are definitely square to each other, run string between each of them to give you a straight line.
Then, walk around with a can of spray paint to mark a straight line below the string. This helps a lot when installing boards to make sure they're nice and straight, and will be square at the corners.
At this point, I also like to measure in at each corner and make a hash mark where the corners will be rounded. It's not necessary to curve your corners, but it looks more like a real hockey rink and importantly, you can wrap the puck around the corners for a sneaky pass or to clear the zone.
Install hockey boards and brackets
There are a few different options for boards and I've covered them in my 2018 blog post about How to build a backyard hockey rink.
The full DIY option is to rip plywood into 12 inch wide strips or use other similar-sized boards and build 2x4 brackets to hold them up, with rebar stakes.
A similar option is to use 3/4" thick plywood strips or other boards and hold them up with plastic brackets from Nice Rink.
Or, go all the way with Nice Rink for brackets, high impact plastic boards, kickplates, and foam bumpers, which is what I do. They sell full packages with everything you need for whatever size rink you want.
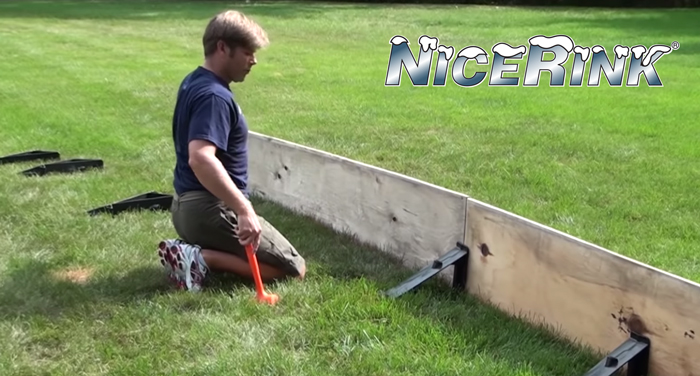
Tyler from Nice Rink demonstrates using their brackets with plywood. Their website has several how-to videos.
I've been using Nice Rink for all my backyard rink builds. I've been very happy with both the product and working with the owners, Jim and Tyler. The father-son duo have been out to my rink and they're very nice folks from Wisconsin.
The plastic for the boards, brackets, and liner is high quality, well-designed, and doesn't crack or rip in cold temperatures.

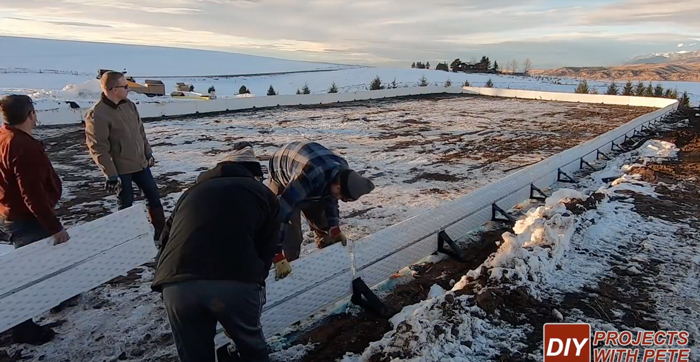
To install the boards, first lay out the boards and brackets all around the rink. Step in or hammer the brackets along the spray paint line and place your boards into the brackets. You'll want to do the brackets and boards together as you go—don't just hammer in all the brackets first.

The Nice Rink system works super well and everything snaps together snugly. It also unsnaps and stores easily at the end of the year. You don't have to worry about the plastic warping, and if it needs it, you can just hose it down to clean off any mud.
It usually takes a couple hours to do the whole rink, and it definitely helps to have a crew of friends. Once you get the hang of it, it goes pretty fast!
Add liner and pull taut
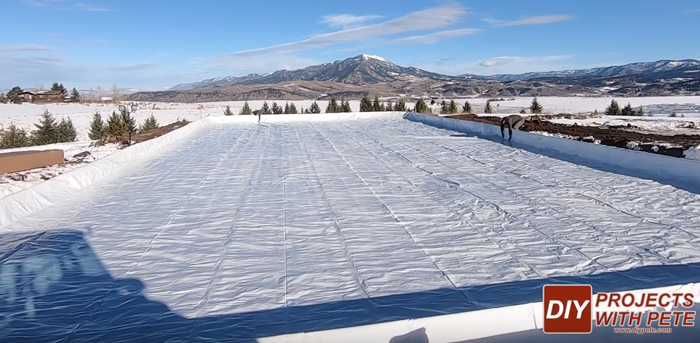
Once the boards are in, it's time for the liner. It's basically a giant tarp that you can buy from Nice Rink. White is the best color because it will absorb the least amount of heat from the sun.
You'll be watching the weather a lot of course, but for the tarp, watch especially for wind. Year 2 was really windy and a total pain to put the liner in, even with a few friends.

So year 3, I had some friends lined up to help in the evening, but when it was calm that morning, I jumped on it. I was able to spread it out and pull taut by myself, it just took a few (or several) laps around the rink. But I would recommend doing it by yourself with no wind versus doing it with friends and wind.
Fill with water (lots of it!)
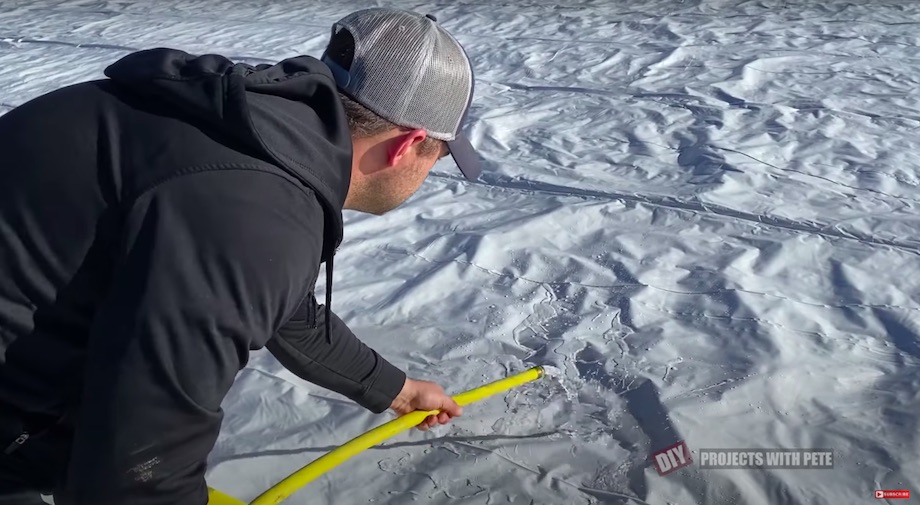
Next up, just add water! It will take a few days to fill your rink because we're talking about thousands of gallons of water. You can calculate how many gallons your DIY backyard ice rink will need with this handy Backyard Ice Rink Water Calculator.
I recommend filling to at least 4" of water in your shallowest area. This will cover any bumps in the ground or bubbles in the liner, and just provide a super solid surface for a season of skating.
Your water source will depend on your house and where you live, but generally there are three options: your house/local water, a well if you have one, or trucking it in.
For year 3, I went totally with the well because I had an inspection and decided it could handle it. There would be enough water in the well, and the pump was strong enough to work for that long.
To calculate a rough amount of time that it will take by filling from your hose, fill a 5 gallon bucket and time it. It took about 50 seconds for me, so 10 seconds per gallon. Then just multiply that by your total amount of gallons.
My rink this year took 3 and 3/4 days to fill!

In year 2, I trucked in most of the water. This took several loads and a lot of time. I was fortunate to have a good friend with a family in the business of hauling things like water.

Add kick plates and bumpers to your boards (if you choose to)
The kickplates and foam bumpers definitely add a level of finish to the rink, and have a few other advantages. Mainly, they hold the liner in place and protect it from getting cut by skates, sticks, and pucks.
The kick plates smooth out the boards too, especially in the corners. And the bumpers make a nice soft edge on the top for any falls, which is just a good idea.
Put in the kick plates once the rink is mostly full of water and has stretched the liner all the way. You can maybe pull the liner a little more taut up and over the edge, then put on the kick plates.

Do it while the water is still liquid, and the kick plates will freeze in solid—a bit beneath the ice, which is what you want.
To install them, the premium L top version just slides on over the boards and liner. The regular kick plates include screws to screw them in place.
You need to overlap the kick plates a few inches, and try to do it in the same direction all around the rink. That will help with shoveling and resurfacing, so that you can go one direction and not get caught on any loose edges.
The bumpers just slide right over the board, liner, and kick plates. They're like beefed up versions of pool noodles, with a channel down the middle. When you make it all the way around the rink, just cut a little bit off the last noodle to fit.

Let it freeze—and hope for cold, clear weather!
With the boards in, the rink filled, and the kickplates installed, it's time to sit back and wait. Your DIY outdoor hockey rink just needs a little time to chill.
Give it a good 3 or 4 days before walking on it. More time if the ice is really thick or if the temps aren't that cold.
If you're super lucky, the rink will freeze smooth and clear. If you're like me in the Rockies, you'll probably get an unexpected snowstorm... even if you've been watching the weather for weeks!
If it snows before the rink is frozen, it's not great, but it's fixable. Year 3 was pretty bad for this, but I was able to remedy it with a few techniques—see below.

Troubleshoot bumps and ridges
Boy, the snow system that dumped right during the freezing time was a pretty big bummer. It created a slush that froze and made it really bumpy and had a few big ridges. But the only thing to do was to get out and try to fix it!

I found a few helpful ideas on the Facebook community of Backyard Ice Rinks and tried "bucket dumps." For a bucket dump, you just want to dump a large amount of water all at once that will fill in all the low spots.
You can drag around a trash can or wheel barrow full of water. I had a small ATV trailer that worked well since it was on wheels and had a nice waterproof bed.

Another technique was to use heat from a propane weed torch. This ended up working well to fix smaller bumps and air bubbles, but it didn't really work for the ridges.
Once you've smoothed out as many big bumps, ridges, bubbles, and debris as you can, you can always try a normal resurfacing coat. It might take a few coats!
Lastly, just skating on the rink will shave off some of the problem areas. Just get out there and start enjoying it, even if it isn't perfect!

You'll find different patterns of shoveling work well for different types of snow
Shovel and resurface the rink as necessary
Congratulations, you've signed up for a great winter exercise routine (in addition to your normal skating)! You will spend a good deal of time shoveling the rink, from fallen snow and also snow from skating.
At an indoor hockey rink, the ice resurfacer has a built in blade to shovel and scoop the ice shavings, but for me it's a two step process. First I shovel the ice as best as I can, then I resurface.
You're probably wondering why I don't just say Zamboni instead of ice resurfacer. Well, Zamboni is a very popular brand that makes ice resurfacers, but it is not the generic term. So it's more proper to say ice resurfacer.
Anyway, ice resurfacing on a DIY outdoor hockey rink usually takes a bit more time and effort than driving around a Zamboni or Olympia machine.
If you've got the energy, it's great to do it at the end of a night of skating. You might still have a team to help shovel, and you'll have the whole night to let the water freeze solid.
I usually resurface once a week or so, depending on how many folks skate on the rink and how often. If I'm getting ready for a big skating party, I like to have fresh ice to enjoy with everyone!

Add hockey goals and a 'shooter tutor'
Hockey goals are made of big heavy steel bars, usually painted red. You can maybe pick them up locally, otherwise you can also buy them from an online hockey store.
I like to practice my shooting with a goalie target or a 'Shooter Tutor.' It has a goalie printed on it and holes cut out for the main targets to shoot at: each corner plus the "five hole," between the legs. You can use bungees or zipties to attach it.
Hang lights for night skating on posts or nearby trees
If you live where it's cold enough for an outdoor hockey rink, you probably live far enough from the equator that it gets dark pretty early. In Montana in the middle of the winter, it gets dark around 4 or 5 in the afternoon, so you end up skating in the dark quite a bit.
So it makes sense to spend some time and money on good lights. The first year I built large posts out of 4x4s that sat on top of the ground and they worked pretty well.

Already by Year 2, I cemented in the posts by augering holes and filling them with concrete. Then I welded up metal post-holders and attached them to the concrete, with long 4x4 wood posts reaching skyward from the brackets.
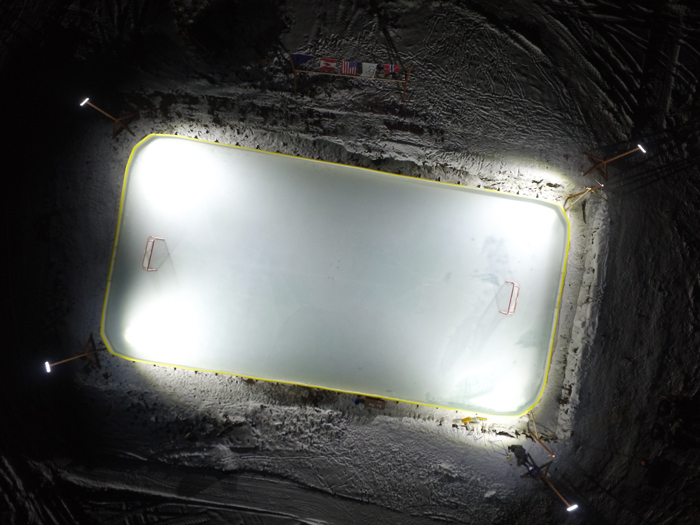
I purchased LED lights with 36,000 lumens from Amazon and they're super bright. They require 220v electricity, so keep an eye out if you only have access to the usual 110v and buy the appropriate style.
With my size of rink, I did six total lights: one on each corner and one in the middle on both sides.
For a smaller rink, you could get by with just the corners or even one light on each end. On our rink growing up, there was a tree on both ends that limited the size of the rink but worked well for attaching lights to.
Remember to attach the lights at a bit of angle to point down and get the most out of them. I used some scrap wood to make a 30 degree angled bracket for the lights.
Hang a net to catch pucks
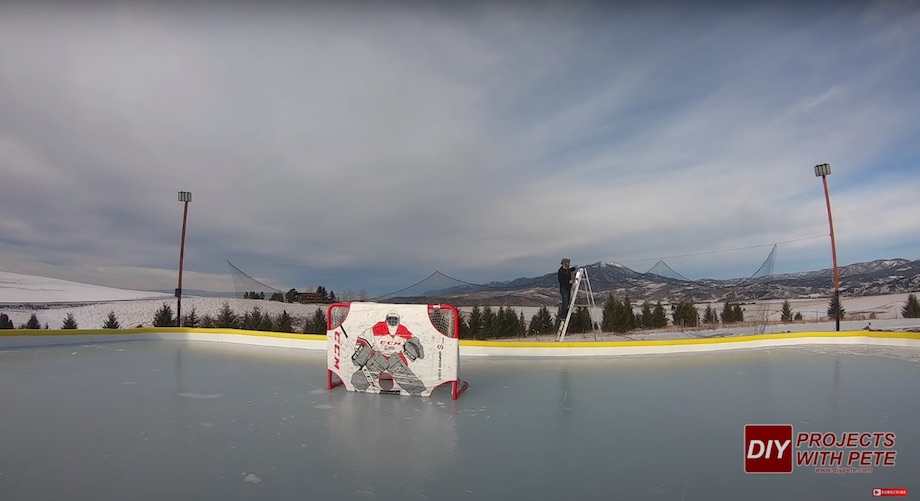
You'll lose pucks into the snow no matter what—I found 91 pucks in the grass this spring! But to try to minimize that, I hung up nets on each end of the ring between the light posts. There are a variety of nets and sizes available here.
I used a combination of 3/8" cable and u-bolts, eye-bolts, pulleys, and carabiners to hang the cable between the posts and pull it taut.

Accessorize with flags, fire, benches, and music
I like to share my own team pride and friends' too by hanging flags for our favorite teams. There's usually about five flags flying at center ice: flags for the USA, Canada, Norway, the Montana state flag, and the Olympic flag. It's especially windy in Montana so I pay a little more for a flag that will last.
I've found Fanatics to be the favorite site with good quality banners, good prices, and tons of cool stuff for all different sports and teams. I made metal brackets that attach to the light posts for team banners, and later added wood brackets, too.

Here you can see my original metal bracket for the Montana banner, and a wood version for the Kings banner
The Minnesota Wild is my team, but I also share the love with a few other NHL teams. I've got the local Montana State University Bobcats flying too.
Two of my Youtube subscribers sent me banners this year so I hung those up: banners for the Boston Bruins and the LA Kings.

A fire place is great to warm up around on those cold nights, and just adds a neat vibe and nice smoky smell. I have had good luck with a Solo Stove metal fireplace. It keeps the fire contained well and has good air flow to get the fire started easily.
You're going to want benches for taking a break. I had built some already and here are DIY plans for a basic bench. Of course a cooler or a stump always works, too!


I've upgraded from a small battery-powered boom box to four Atrium 6 outdoor speakers powered by a small Fosi Audio amp. They're installed on the light posts because they're nice and high to project the sound and there's already electricity at the posts.

Invite your friends over and drop the puck!
After all that hard work and preparation, it's time to enjoy! I've learned that the saying from Field of Dreams is true, "if you build it, they will come." More like Rink of Dreams!
You'll enjoy late night 3-on-3 games with your hockey team, afternoon lessons with the kiddos, and everything in between.
More tips and tricks for building and maintaining your DIY outdoor hockey rink
Those are all the tips for actually building your very own DIY outdoor hockey rink. Oofda, it's a lot, I know!
Now, I'll go over a few other considerations about building and maintaining your own rink for maximum fun.
Ice resurfacing options
Like at an indoor hockey rink, you'll want to resurface the ice with a smooth coat every once in a while. At an indoor rink, they do it between every game or even every 20 minute period... that's probably not realistic for your DIY outdoor hockey rink, but there are some ways to make it fairly easy.
I try to resurface once a week or so, especially after big days with lots of people skating.
The basic idea is to cover the ice with a new layer of water, which will level itself and freeze into a new smooth layer.
Growing up, I remember my dad just walking around the rink with an open ended hose and spreading the water the best he could. Eventually though, we upgraded to a Nice Rink resurfacer.
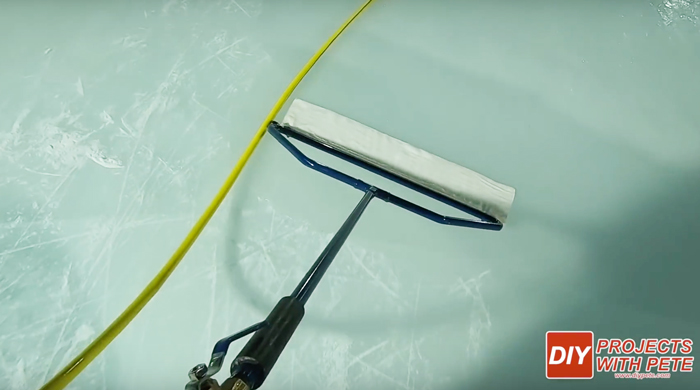
So I've been using the Nice Rink resurfacer for a long time! It is the simplest and least expensive way to get a good coat of water on your ice.

It's made of steel tubes with tiny holes along the bottom and a towel to spread the water out—very similar to a real Zamboni! You simply hook up a hose and walk around your rink. You will need a lot of hose and a hose cart, which is the most annoying part to deal with.

The next option is to use a similar setup with tiny holes and a towel but pull it behind a small vehicle.
You'll want a large tank of water so that you don't have to worry about being tethered by a hose. I found an old 65 gallon tank and fill it up twice for my big rink.
You can build the holey tube and towel device out of metal pipe or PVC. I've found PVC to work well because it's light, easy to cut, and holds up just fine. Don't forget to add an on/off valve!

However... If you give a small vehicle a large tank of water, you're going to have to counter balance it with weights in the front. And if you add weights to the front, you're gonna have to beef up the frame... I learned the hard way!
My friends gifted me with a little tractor that they found for cheap on Craigslist and we started welding brackets on for the water tank and counter balance weights.

The first time we took it out fully loaded, the frame literally bent in half!

We used a skid steer and some boards to push it back down into a straight shape. Then I reinforced the frame by welding on several more pieces of thick metal.
The full-length video about my tractor build that is embedded above covers even more details. If you're interested in building your own DIY Zamboni, be sure to check it out... I learned a lot and made many adjustments along the way!
A lower tech version is to use some sort of wagon that you can just pull yourself or use as a trailer. Fill up a large tank or a garbage can and you should be pretty set.

I've also used a UTV like a Polaris Ranger and it is a strong vehicle but a little too big for the job. It's tough to get into the corners very well without running into your boards. You can use Reverse to maneuver a little better, but you don't want the water to pool too much.
Also, be sure to shovel really well before resurfacing!

Shovel options
We get A LOT of snow, so I definitely have experience with and opinions on all sorts of shovels. Lightweight plastic shovels can work well for light fluffy snow. Metal shovels are much better for scraping compacted snow and ice. And then there's snowblowers, too.
Specifically for my hockey rink, I've found Snowplow four foot shovels to work best for light shoveling between rounds of skating. They are wide to cover a lot of area and light enough to not dig in too much. This is what we'll usually do 'between periods' or while we're taking a break.
Before I actually resurface the ice, I prefer a metal shovel to just get a little more snow off the ice. They're heavier and have a sharper edge so they do a better job of picking up all the snow from skating.

The more shovels you have, the better, so that you can get more help. Many shovels make light work!

Snowblower options
Shovels work well for light snow and clearing the snow from skating, but when we get a real dump, it's time for the heavy machinery! I'll review small, medium, and large snowblowers below.

The classic walk-behind snow blower I use a lot because it's easiest to get on the ice and fired up. It's 28" wide, light and easy to maneuver near the edges without damaging the boards. However, if the snow is too drifted and hard, the light weight can work against it, and it won't get all the way down to the bottom ice surface.

I was excited for a snowblower for my ATV 4-wheeler, thinking it would be just the right size at 60" wide. It throws snow pretty well, but it's pretty tough to maneuver and turn. And I've had a few other issues with it too, so I don't really like using it.

After a big, windy storm, I bring out the skid steer with an 84" snowblower. It's a tank and weighs in at 9,000 pounds! I have to remove a section of boards in order to drive it onto the rink.
I've used it for the last two seasons and have not had problems with cracking the ice, but you definitely want to make sure everything is frozen solid before driving on the rink.
It's great for moving the big stuff, but it doesn't always get all the way down to the ice. So anything that it misses will get compressed by the tires and can form ridges on the ice. Especially if it's a sunny day, those compressed tire tracks will bake right into the ice, so you have to be careful of that!

I've also seen folks use a power sweeper and claim that it's a game changer. I bought one too but haven't had much experience with it yet. It's definitely more of a finishing tool though, not gonna bust through drifts with a brush. It will probably be great for using before resurfacing.
Other tips and things to look out for
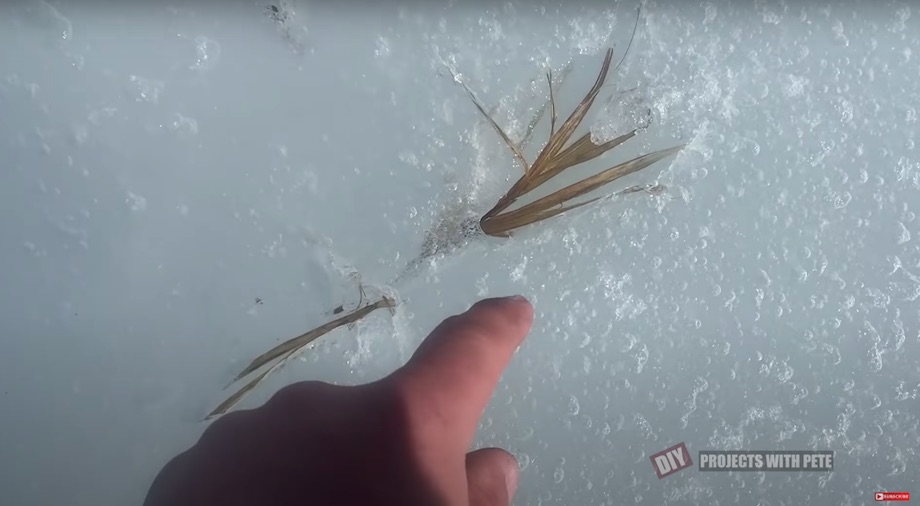
Anything that's dark will absorb energy from the sun and can melt a hole in your outdoor ice surface. Black hockey pucks, obviously, but also leaves, grass, or any other debris. So always be on the look out for these, especially when the sun's out, and remove them.

I did an experiment and set a puck in the ice for about an hour on a sunny 25 degree day and it melted a hole about a 1/2 inch deep (1.3 cm)! This problem isn't too tough to fix but it's best to avoid.
To fix a big hole like this, pack in some snow, add a little water, and smooth it over with something like a puck. It should freeze smooth overnight.

Using hot water to resurface the ice is not necessary but can help quite a bit. The warmth helps melt any bumps and just creates a better bond between the old ice and the new layer.
I ended up getting a portable hot water heater that works with propane. It heats water from the hose on the fly, so it's quite convenient and not a huge device.
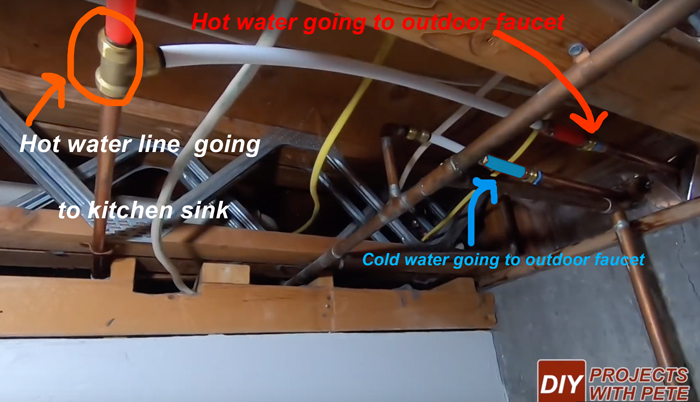
I also ran a hot water line out from the house, which required a bit of plumbing work in the basement. It wasn't too tough to find the hot water line and add a T off of it. The spigot I use has the actual valve placed a ways back into the house, so it's more insulated and doesn't freeze.

Year-end teardown
At the end of the season, your ice will melt into a pond. It's time to tear it down and store everything until next year. Get yourself a good pair of waterproof boots (if you haven't done that already!).
Fill a jar with water from your rink if you want to follow my tradition of adding last year's water to the next year's rink.
If you're using the Nice Rink system, you'll remove the bumpers and kickplates first.
To remove the liner, you can try to save it, but it gets really muddy and I've never been able to roll it up to a size anywhere close to how it came. I also have a pretty big rink though, so it might be more manageable with a smaller rink.
I've been able to donate sections of the waterproof liner to friends and locals who use it for all sorts of things, so try to recycle it that way if ya can. Otherwise it's a trip to the dump.

I'll cut it up into sections and the water just runs out and back into the earth. It does get very muddy, so be ready! I'm working on planting grass where the rink is, so that will help with run-off and mud.
Then take down all the boards, take out the board brackets, and start stacking 'em. The plastic Nice Rink boards are also easy to hose off if you want to store them clean. I store them on a pallet that I can move around with my skid steer.

A leaf blower can add just a little extra power to your skating!
Other DIY outdoor hockey rink resources
Thanks for making it this far through the tutorial about how to build a DIY outdoor hockey rink! I'll include a few more helpful resources and then wrap it up.
Coach Jeremy has a great Youtube channel about building his own rink, funny hockey moments, as well as drills and practice ideas for hockey players.
Elevated Hockey hosts camps, shares drill ideas on Instagram, and has a great podcast for players and coaches.
Backyard Ice Rinks has an amazing Facebook community that can be super helpful for ideas and troubleshooting.
Outdoor Rink Heaven is the Instagram channel that I mentioned above with incredible photos of outdoor rinks all around the world.

Conclusion
Wow, another great season of hockey and learning in the books, and a big tutorial and video for folks to enjoy and hopefully be inspired by.
In the video, it may seem like it snows every other day in Montana... and that might be kind of true! But all the shoveling and snowblowing and general outdoor rink maintenance is totally worth it.
The weather in the foothills of the Rocky Mountains can be very windy, snowy, and unpredictable. Hopefully wherever you live will have a little less of those conditions!
Please share all your outdoor rink experiences, from building tips to fun memories below in the comments—I always love to hear about it and I try to reply back!
Alrighty, thanks again for reading this article and watching my video. Please consider subscribing to my Youtube channel if you haven't already—that's the easiest and best way to support what I do!

Cheers from Montana,
DIY Pete

