
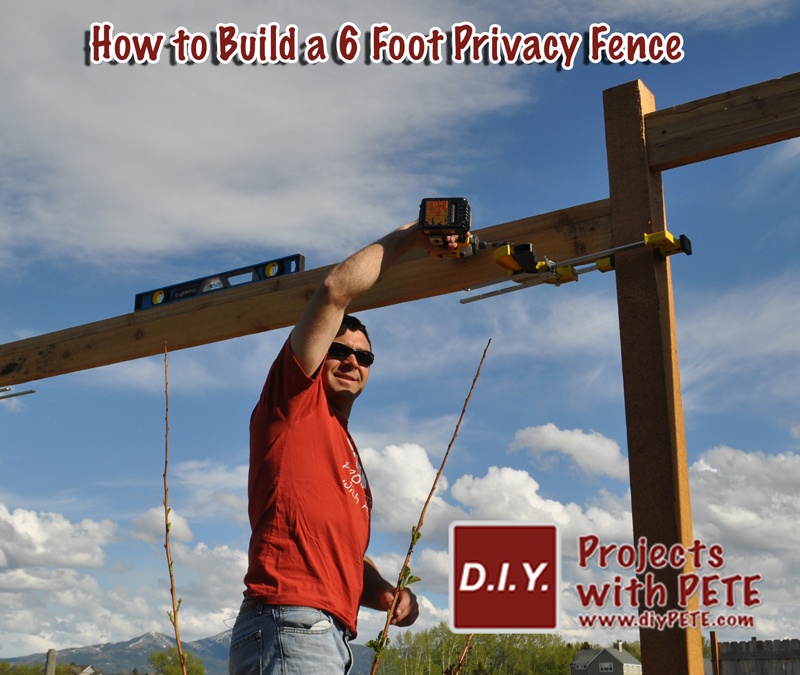
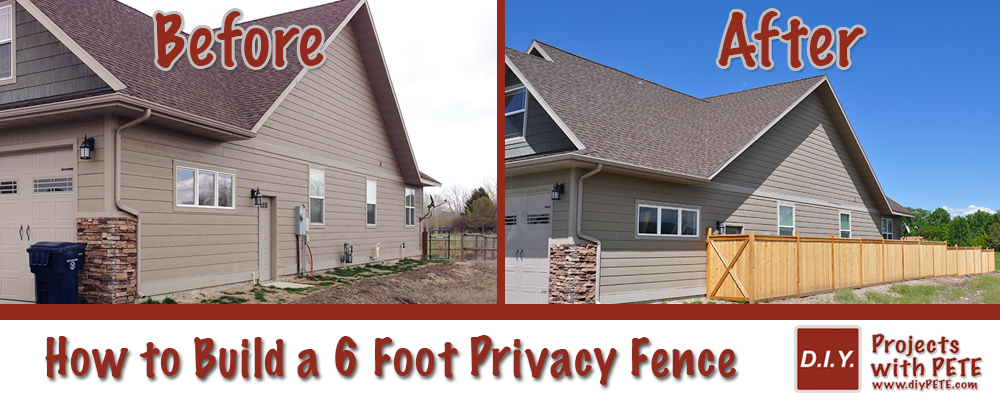
 This summer I have a number of big DIY yard projects to conquer and cross off the list. The first of many was the building and installation 6 foot privacy fence that will eventually surround my entire back yard. I chose to build my DIY fence out of cedar because I love the look and the characteristics it has to withstand the elements outdoors.
Please note that this is not as in-depth as many of my tutorials. It was somewhat of an afterthought to do a tutorial on this… So I don't have photos of each process.
Benefits of an Outdoor Privacy Fence
- Privacy from neighbors and people passing by
- Keeps pets in the yard
- Looks great and adds value to a home
- Covers unsightly wires, cables, and electrical boxes
- Added security to your yard and home
- Storage (can store a mower or lumber) outdoors without it looking unsightly to neighbors
Tools Needed for DIY Privacy Fence Installation
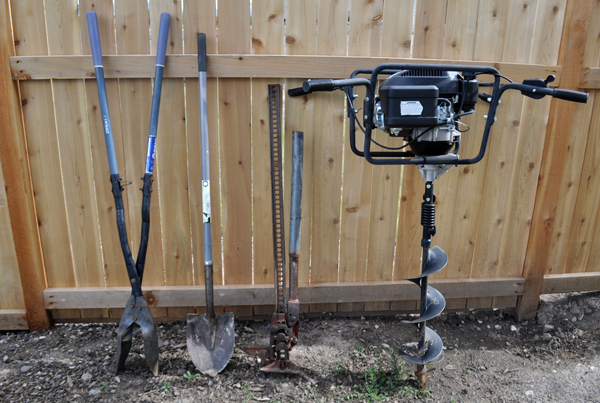 Long Tape Measure
Hand Post Hole Digger
Gas Powered Post Hole Auger (Optional)
Shovel
Hi-Lift Jack (Optional for removing old posts)
Drill and or Impact Driver
Post Level and Square
Line Level
Level
Miter Saw
Circular Saw
Table Saw
Air Compressor (Optional for attaching pickets quickly)
Framing Nailer (Optional for attaching pickets quickly)
Supplies
Masons Line (String)
4″ wood screws for rails
3″ screws for attaching top rails to each other
2″ screws or nails for attaching pickets
4×4 x 10 foot or 8 foot posts (Cedar or Pressure Treated)
2×4 x 8 foot rails ( 4 for each section )
1×4 x 8 foot trim ( 2 for each section )
1×6 x 6 foot flat top pickets ( roughly 16 per section using 8 foot sections )
Wood gate kit
Wood Stain
Stain sprayer (Optional)
Stain brush/pad
Research
Prior to building and installing your your DIY fence, I ‘d recommend driving around neighborhoods in your town to get ideas for your fence. I found a fence a few blocks from my house that I ended up modeling after. It was made by Bill Conover with Conover Fence of Bozeman, Montana. If you live in Bozeman and are not the “Do it Yourself” type, I'd highly recommend Bill's company.
Step 1
The first step when building a fence is to check with your homeowners association and the city to see if there are covenants or rules you'll need to follow. In my home town, city limits they restrict fences over 6 feet tall. My homeowners association requires the fence to be stained and allows fences only in the back yard. So double check the rules prior to building. A permit may be required to build your fence. You might also need to remove an old fence prior to starting.
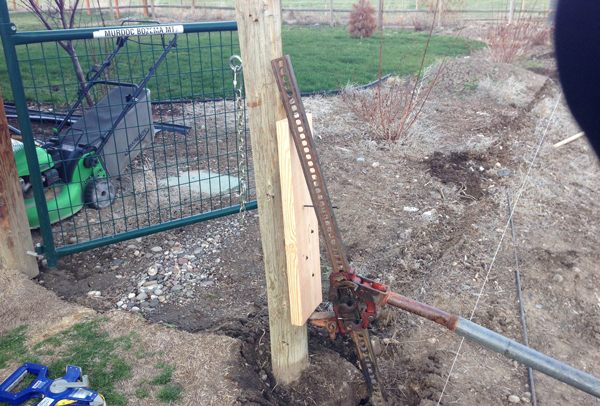
Removing Fence Posts
I'd recommend removing old fencing posts using a hi-lift jack. The first section of fence I had to remove had 8 posts. It took about a half hour to remove all of them.
Chain
Hi-Lift Jack – Post Popper
Hi-Lift Jack
 To remove the posts, I attached a 2×8 board to the post using 4 leg bolts. Next, I used a high lift to slowly jack the post up and out of the ground.
 Sometimes the post can be real stubborn. In this case, you can use a chain in combination with the hi-lift. See the video below.
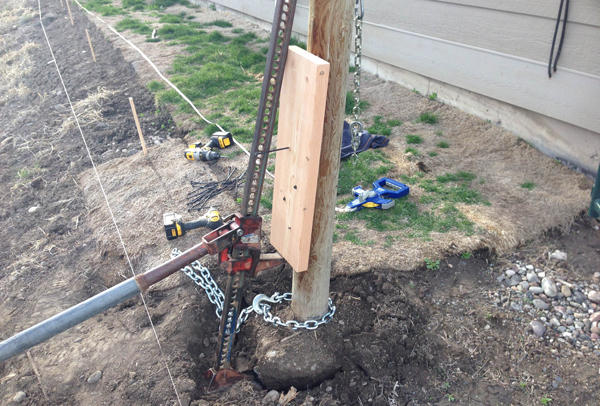 My buddy Dan from the HandyManStartup created this video for his business. He does a great job explaining how to remove posts using a hi-lift jack and a chain.
Step 2
Determine where your fence will go. I ran mine right inside my property lines. My property runs 5 feet out from the foundation wall of my home. You'll want to find your property line markers to ensure you are correct in placement. There is a stake at each corner of my property which can be found with a metal detector (or you simply dig about 4 to 6 inches for it with a small garden shovel.
Step 3
CALL BEFORE DIGGING YOUR POST HOLES!
This is a very important step and it illegal to not get all of the utilities marked. Skipping this step could cause a gas line leak, water issues, and cables being cut. They'll mark for your water, sewer, gas line, cable, phone, fiber optics, electricity, and any other utilities you may have. Call a week or two prior to starting your project. This will ensure you can start on schedule. All of my utilities were marked within 3 to 4 days of calling the hotline. Go to www.call811.com to find the phone number to call in your state.
Step 4
Measure the distance of your total fence using a long tape. Use string to create a straight line to ensure your posts are all in line with each other and on your property. I put a wood stake about every 8 feet to show where I'd drill the post holes.
 Step 5

Dig the post holes. Make sure you are away from the utility marks and then go for it. You can dig by hand using a manual post hole digger. However, if you have more then a few holes I'd recommend renting or purchasing a gas powered auger to do the job. You can get 1 or 2 man augers. I prefer the one man augers as it doesn't require having an extra person around for the process. But if you have some pizza and beer laying around for your friends after digging, the two man auger will work just fine. You'll want to dig the holes about 2 1/2 to 3 feet deep for a 6 foot tall fence. You'll find posts available in both 8 foot and 10 foot lengths. I'd recommend talking to a local contractor to see how deep they'd recommend digging fence posts in your part of the country. Frost levels and soil type can make a difference.
Step 6
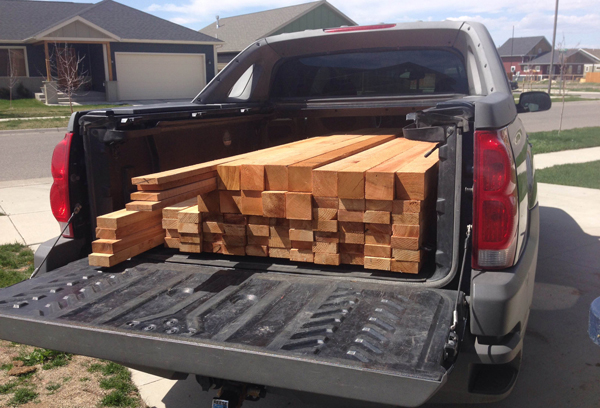
Purchase the wood for your project and unload it. I used cedar for my fence posts and rails because I love the look of an “all cedar” fence. You could use pressure treated posts and rails if you'd prefer. All of my cedar wood for the project came from a great local company named Emmer Brothers Cedar near Bozeman, Montana.
 Step 7
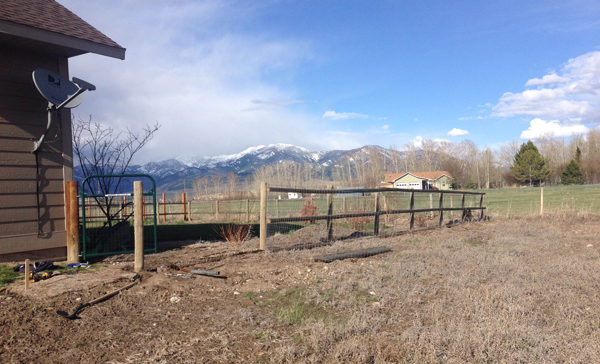
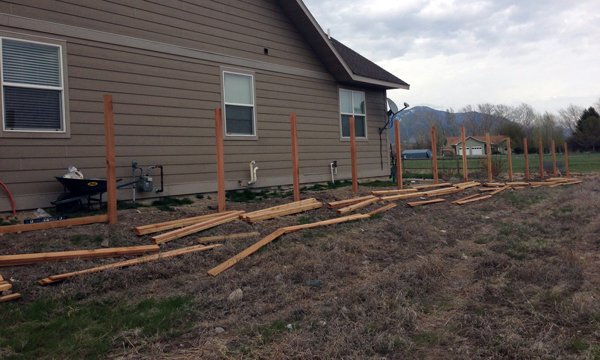
Lay the wood out for each section and then put the posts in. I started out by putting 3 to 4 inches of gravel in the bottom of each hole. This helps water to drain away from the post and helps prolong the life of the posts. I then placed the post in, followed by quick setting concrete around the post. I mixed it in a wheel barrel and then put it in each hole. I'd highly recommend using concrete in all the end and gate posts at the very minimum. A mixture of sand and gravel is another good solution for center posts as it packs very tightly and does not eat away at the cedar. Once each post is placed, make sure it is level and in line with the string used to mark the fence line that ensures the row is straight.
 Step 8
 Step 8
Attach all rails. For the top rail I attached two 2×4's together at 90 degree angles using 3 inch deck screws. Once attached, you can attach the rail to each post using 4 inch deck screws. Use a level to ensure you don't have a crooked fence. Having a friend help hold the rail up is ideal. However, you can use clamps to help with the process if you are constructing the fence on your own. I'd recommend Jack Clamps b/c they are one of the most versatile and well built clamps on the market.
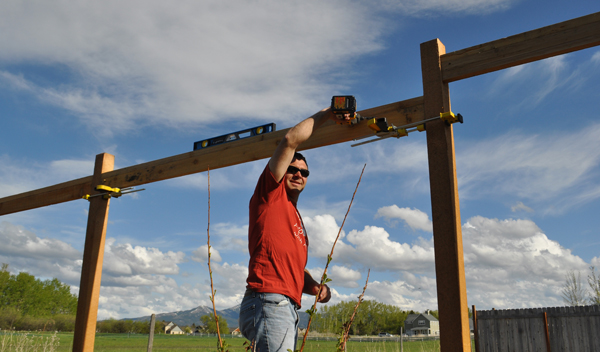 Here is an up-close photo of the top rails. The top plate 2×4 is connected to the other 2×4 from the top with the 3 inch deck screws. I then attached the connected rails using two 4 inch screws at the end of each board.
 You'll need to install a middle and lower rail as well. (the photos were taken after the project was competed which is why the pickets are already in place)
 Step 9
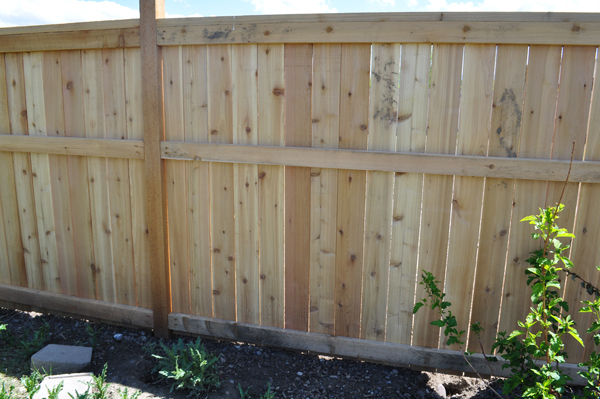
Attach the pickets to the rails using 2 inch screws or an air nailer. Use 2 nails for each rail (6 total for each picket). You may need to rip the last picket for each section to get a perfect fit. Use a table saw or circular saw to rip the picket. After all pickets are attached add 1×4 trim to the top and bottom of each section.
 Step 9
 Step 9
Build a gate. I'd recommend buying a steel gate kit to help out with this process. I added an “X” to the front of my gate to give it a barn door style look.
 This is a photo of the gate kit for a wood fence. The instructions in the package make it very simple to build your own gate. Plus, the steel helps prevent the gate from sagging.
 Step 9

Use a circular saw or reciprocating saw to cut the tops of the posts down if needed. I haven't put on the post caps yet. But you will want to add a fence post cap to the top of each post to keep the water off and to prolong the life of the posts.
 Step 10

Stain the fence to prolong the life of the wood and to give it a nice durable finish. Use a semi transparent or solid stain as it will stand up best against the sun and weather. Spray the stain or use a large stain brush/pad. Using a stain sprayer will speed up the process.
Step 11
Enjoy your new DIY outdoor privacy fence! You'll now have added privacy, a secure yard for pets, and a fence all your neighbors are going to comment on!
If you have questions, please ask below. Share with your friends and family if you think this type of fence would look good at their home!