

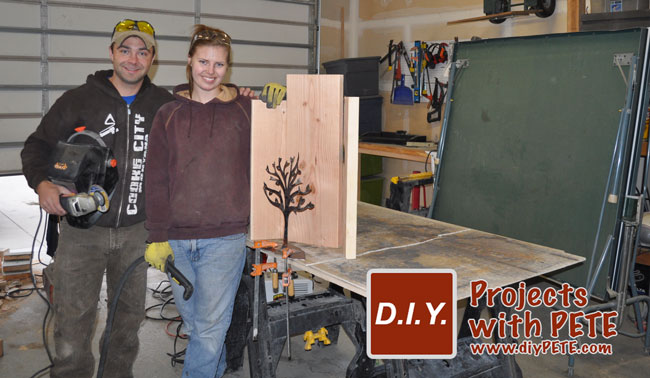
 Aly and I were looking for a fun metal project to do as a gift for her mom. After some thought, Aly and her brother came up with the idea to make a jewelry tree. This was Aly's first metal project ever and she did an amazing job. Plasma cutting and welding were much easier than she thought they would be.
Time: This project can be done in 2 to 4 hours
Cost: Metal : About $10 ( We used metal from a local shop named Pacific Steel ) – 16 gauge steel so we can bend the leaves a bit
Difficulty: Beginner
Skills required (Plasma Cutting/Grinding/)
Tools Used:
Hobart 250CI Plasma Cutter – (one of my favorite tools in the shop) – I got mine at Murdoch's Ranch and Home Supply.
Orbital Sander
Angle Grinder – (Use Flap Disc and Metal Cutoff Blade)
Drill
Optional: Blow Torch – To heat up metal for Patina Process
Optional: Metal Patina – Ferric Nitrate (To color metal with rust colors and maroons
Optional: Metal Patina – Potassium Sulfate (Black / Dark Brown)
Spray Sealer for Metal (Solvent based)
Materials:
16×16 sheet of 16 gauge metal
12 Gauge steel to use for base (roughly 6×6 inches)
The Overall Process
The project involved coming up with a design, drawing the tree, plasma cutting, drilling holes to hang earrings, and mounting the tree to a base with epoxy. The project went quickly and was a lot of fun.
First Step
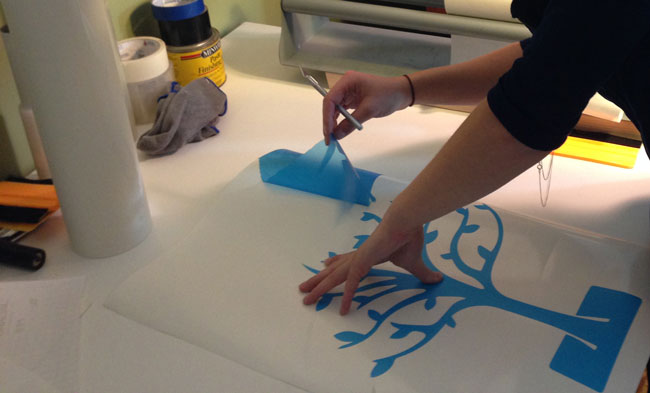
You'll first need to come up with a design. Aly found a tree design that we were able to work with on a computer and enlarge using Adobe Illustrator. We then printed the design on stencil decal vinyl using a Graphtec Vinyl Plotter. You could also use a Cricut vinyl plotter which are very neat tools for crafters. If you don't have a plotter, shoot me an email on the contact us page and I can get you set up with a custom vinyl stencil.
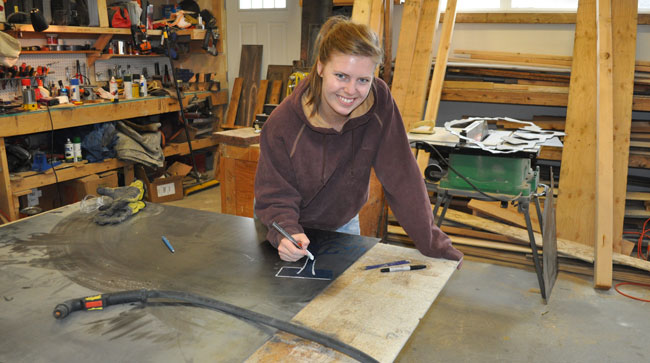
 Trace Design
Trace or draw your design on the 16 gauge metal using a sharpie marker or soap stone pencil. If the metal is greasy first clean it using a rag and a solvent.
 Plasma Cut
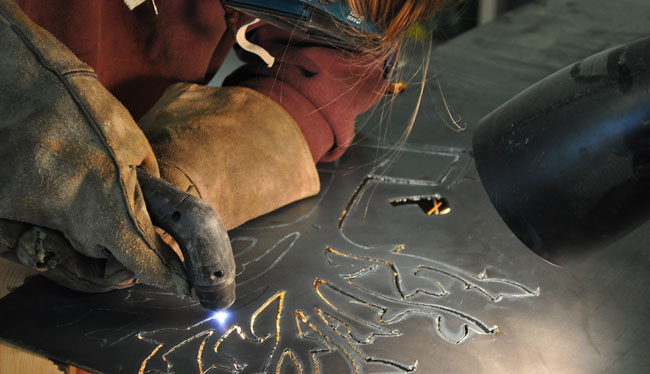
Use a plasma cutter to cut out the design. Keep the tip of the plasma cutter about 1/8 of an inch off the metal to create a nice smooth and clean cut. Aly was intimidated by plasma cutting before trying, but quickly learned how fun and simple it is. For this project and all my metal projects I use the Hobart 250ci Plasma Cutter. It plugs into a normal 110v outlet and has worked great for the last 5 years.
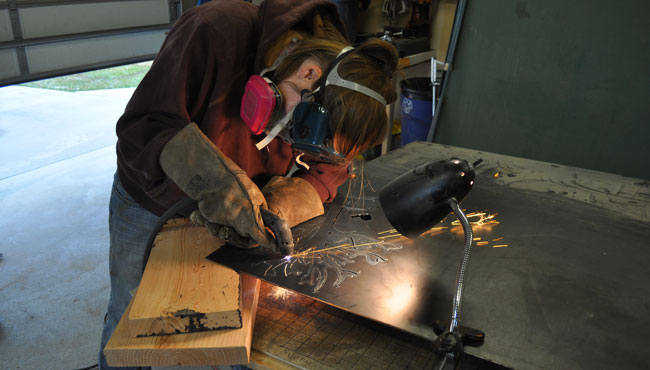
Here is a photo of Aly cutting the jewelry tree. Good lighting helps make cutting much easier.
 Up close shot of the tree. A little “slag” is created on the underside and top which can be removed and smoothed out using an angle grinder.
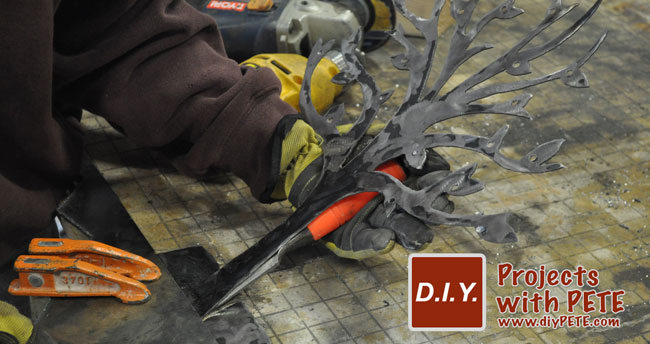
 Grind
Grind

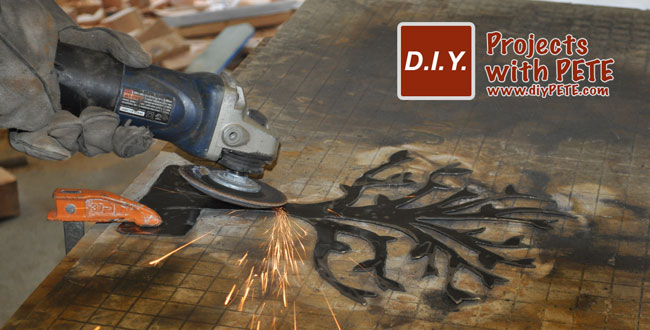
Use an angle grinder with a 60 to 80 grit flap disc to clean up the edges of the tree. Don't forget to clamp the tree to your work surface to keep it from moving around.
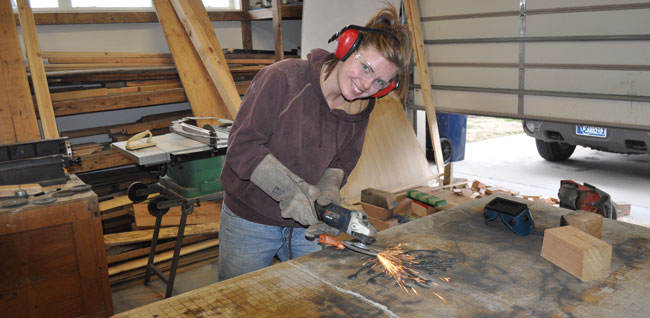 Use an 80 grit flap disc to grand the surface if you so choose. The steel has a dark grey coating on it when bought. We randomly used the grinder to remove blotches of the film, creating a bark like look.
 Drill
Drill
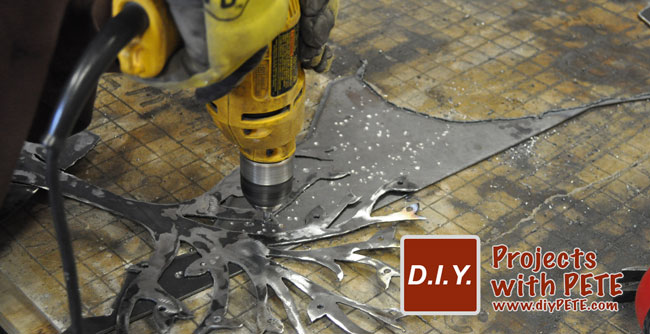
Use a 1/4 inch drill bit to put holes in the leaves of the tree. You can use the holes to hang earrings.
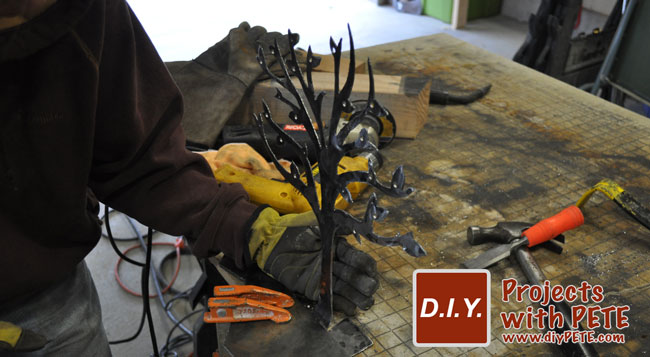
 Bend
Bend
Use a chisel or pry bar to evenly bend your tree so it stands up vertically.
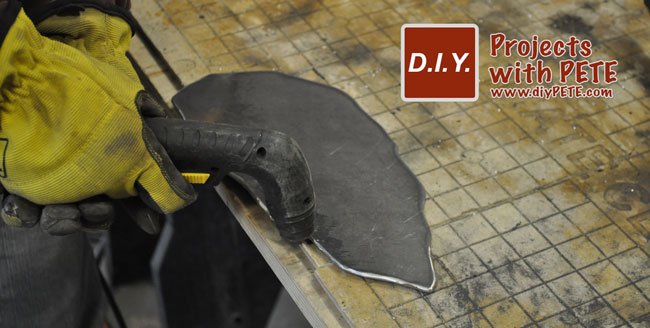
 Plasma Cut the Base
 Plasma Cut the Base
Use your plasma cutter to cut a heavy base for the tree. We used 10 gauge steel and cut it in a random shape that measured about 6″ by 4″.
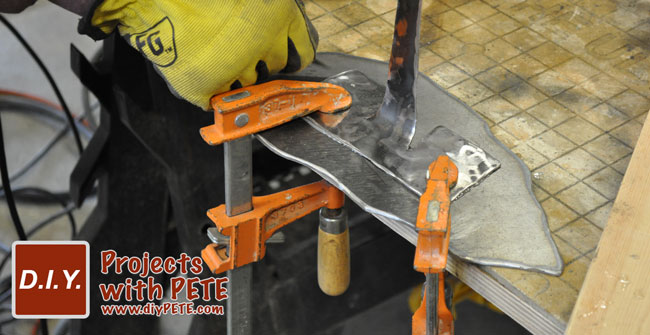
 Attach Base
Attach the tree to the base using a clear quick setting epoxy.
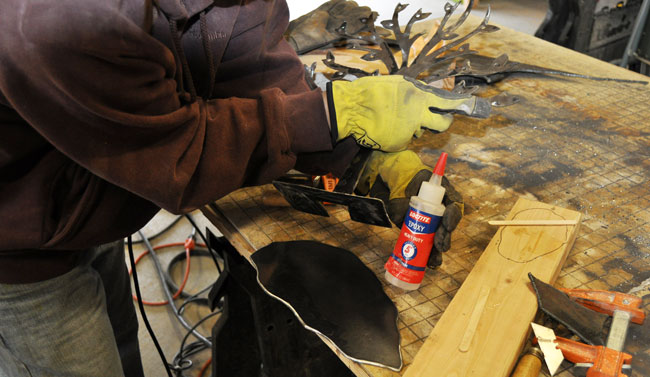 Clamp the tree to the base and let the glue dry for an hour or two.
 Fine Tune
Bend the leaves and branches to give the tree some character and dimension. Seal the entire piece using a couple thin coats of solvent based metal sealer. We used a Rustoleum sealer that was about $4.00 at Home Depot.
 Admire Your Work and Let Dry!

 Finished Jewelry Tree
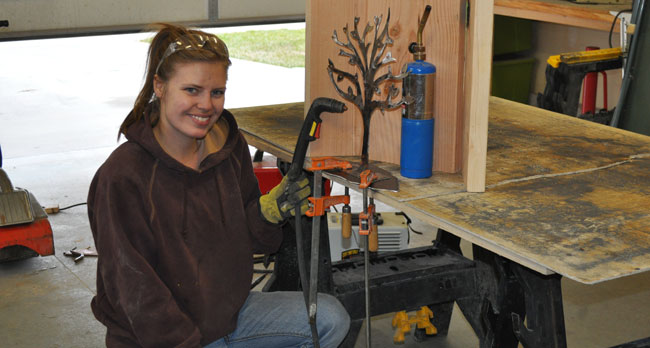
Woohoo! Your tree is now completed and ready to use. Add a couple felt pads to the base so the metal doesn't scratch the surface you put it on. Your new metal jewelry tree will hold about 16 sets of earrings and a bunch of necklaces.
Let me know what you think of this project. Good luck with your projects and have fun creating!