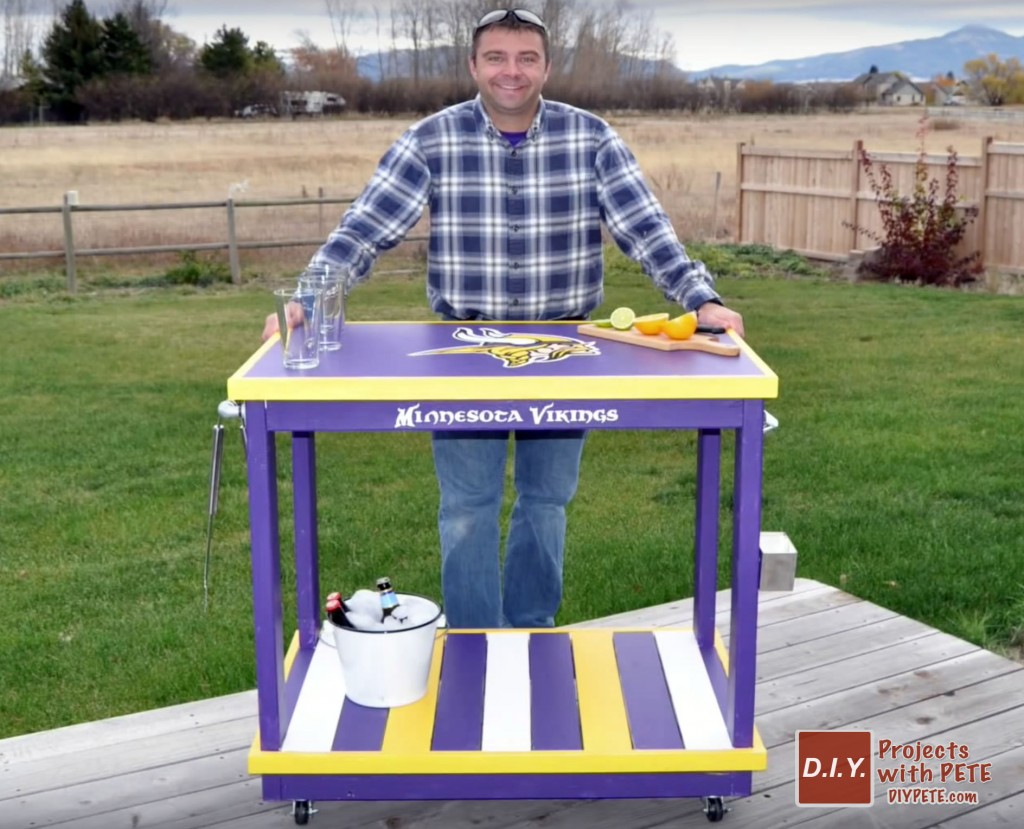
Football season is upon us! If you remember back, I teamed up with Glidden NFL Team Colors Paint for a pair of NFL themed projects using their official NFL Team Color paints. I wanted to share these downloadable plans for the NFL Team Rolling Bar Cart. This is a great project that is easy to create and would be perfect for your football game watching parties. Beyond having the detailed, 12 page plans, here is a brief video tutorial below.
Tools Needed
Miter Saw – I’d recommend a 12 inch miter saw.
Orbital Sander – Ryobi makes a nice one.
Circular Saw
Kreg Jig – The K4 is what I have.
Drill – I use Ryobi drills.
Tape Measure, Ruler, Pencil
Wood List
QTY: 1 – 1×6 by 4 Foot Long Board
QTY: 4 – 2×4 by 8 Foot Long Board
QTY: 1 – 1×4 by 4 Foot Long Board
QTY: 1 – 1×4 by 8 Foot Long Board
QTY: 1 – 24”by 36” by 3⁄4” Plywood Board
Approximate Total Cost: $35
*Approximate Total Cost the the DIY Rolling Bar Cart (Not including tools and supplies you might have like rubber gloves, paint brush, stain, paint, screws, etc.)

Download Plans and Make All Your Cuts
Cut each piece to size on your miter saw. For all cuts’ lengths and widths, refer to the cut list above. Some cuts may require ripping on the table saw, this is optional, or you can buy boards to size at store. If you don’t have a miter saw you can find one here. Download plans here.
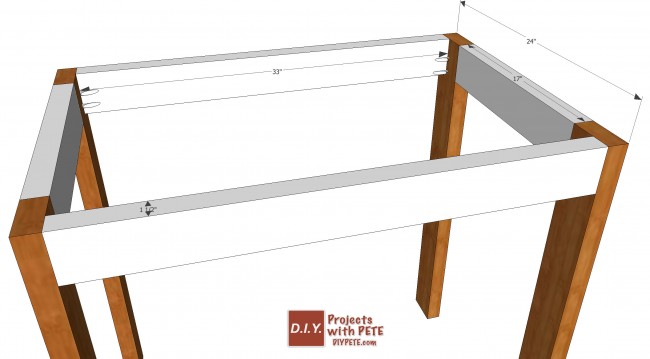
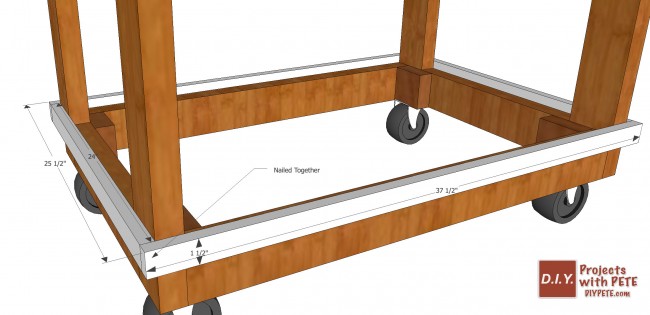
Assemble The Base
Once you have all of your boards cut to size, it's time to assemble the base of your rolling bar cart. Drill pocket holes into the intersections of the base where the 2x4s will meet. Use a Kreg Jig for this. Apply glue in the joints and then screw it all together with 2 1⁄2” Kreg Screws. The top and the bottom part of the base frame are exactly the same, identical to each other. Construct both and refer to the pictures here in the plans for any questions on assembly.
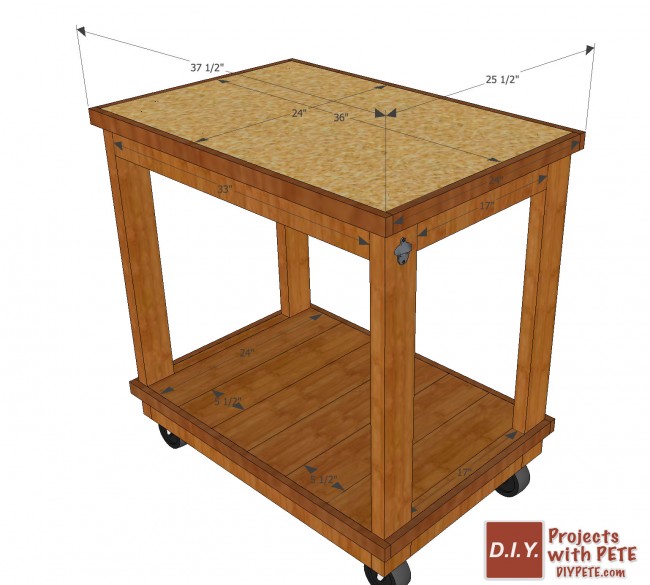
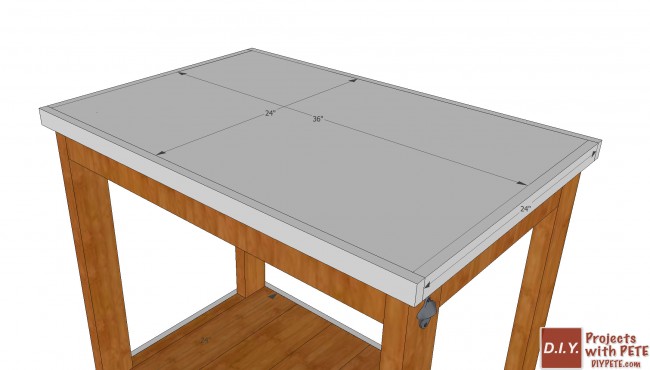
Build the Bottom and Top
Now its time to build the bottom shelf. The shelf pieces itself and shelf stretchers are nailed into the base frame and then stretchers are nailed together at the corners…read more in plans. Now that you have your bottom shelf built, let's build the top for the rolling bar cart! The bulk of the top is the 24” wide by 36” long by 3⁄4” piece of plywood that you cut earlier. The rest is the stretchers that wrap up to it.
Apply Primer and Paint
Now we need to brush or roll on a coat of white primer over the whole rolling bar cart. I used Glidden’s Premium primer. Let this primer dry for the manufacturer’s allotted time. Then prep your work area for the final painting of your favorite NFL Team’s colors!Let the coat dry completely (6-12 hours). Your NFL Team Rolling Bart Cart is now complete! Add any add-ons that you like, such as bottle openers, bottle cap catchers, a grilling tool rack, etc.

Thanks so much for checking out the NFL Team Rolling Bar Cart plans and I’d love to hear how your project goes! Download the detailed, 12 page plans and cut list here. Please post photos on Facebook at www.facebook.com/diyprojectswithpete or elsewhere tagged with #DIYPETE.
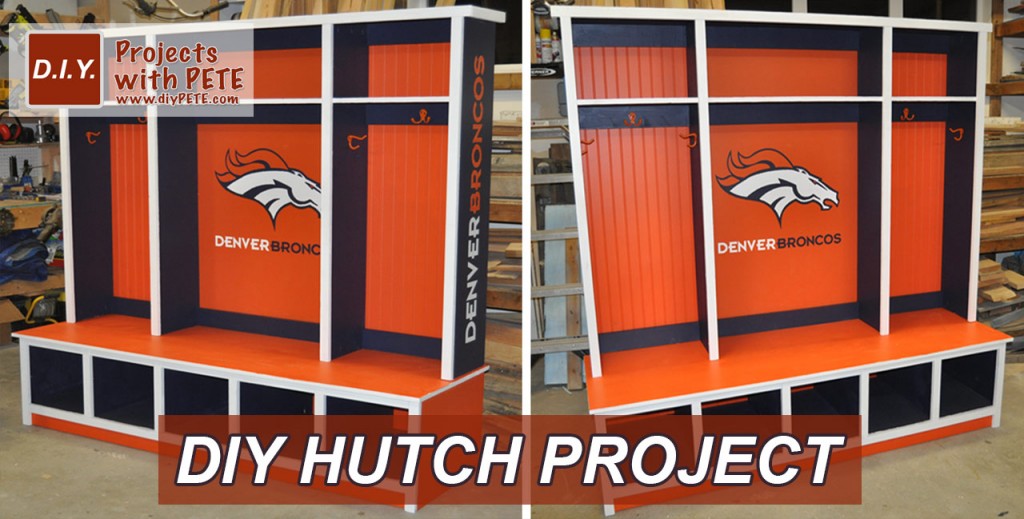
Click on the photo below if you are interested in seeing the other project we created for Glidden NFL Team Colors Paint. Free plans are available to build your own NFL themed Hutch. If you aren't in the mood for an NFL themed hutch, simply paint your project with a solid color.