
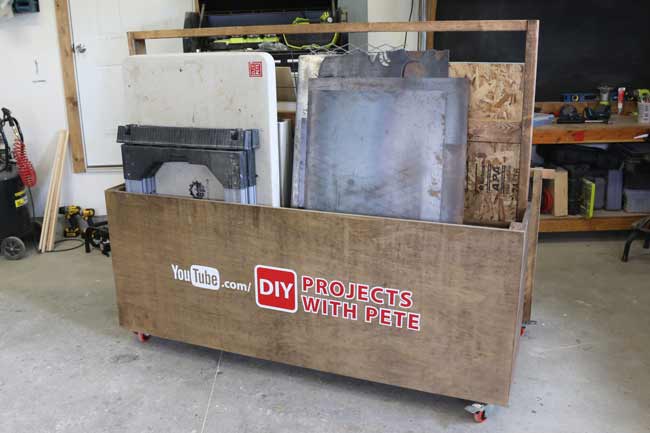
The Plywood Cart is a must have in any workshop where you need to store materials but have limited space. Get your plywood and other materials off of the floor and out of the way! The cart can hold full 4x8 sheets of plywood as well as other sheet materials. It also has a storage bin in the back that can be left open for large items or divided up to custom fit smaller materials or tools. The removable railing makes it easy to load materials from the front and to access materials that are difficult to reach at the back of the pile.
Plywood Cart Plans
Supplies
Materials Needed
- 2x4 Boards
- 4' x 8' Sheets of 3/4" Plywood
- 2 1/2" Screws
- 3" Screws
- 4" Screws
- Wood Glue
Tools Needed
Pleas Note: The links for tools listed in this post are affiliate links. This means that by purchasing the tools and going through the links you are helping support more free projects and DIY videos on DIYPETE.com. Thank you for your support
Get Building!
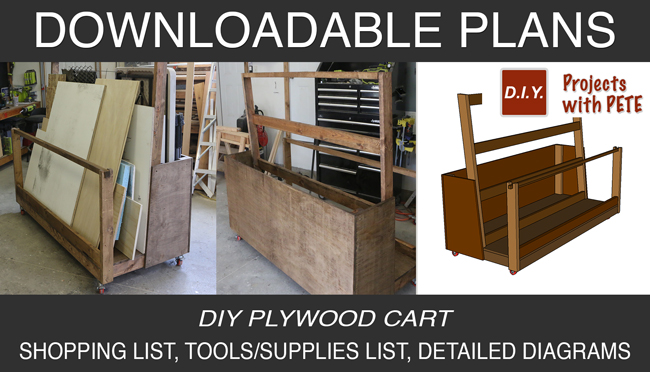
To build your own Plywood Cart you can download the plans. Plans include detailed diagrams, step by step instructions, measurements, and materials used so that you can get building right away!
Construct the base frame
Cut the boards for the base frame. They are all cut from 2x4's. There will be 5 cross supports and two long boards. Once all of that is cut, lay the frame out on a flat table and assemble.

Now that the frame is assembled, we need to add the plywood base. Cut the plywood to size and attach it to perimeter of frame as well as to the cross supports. Now flip the frame and add the extra blocks for wheel support.

Assemble the center support
Cut out two boards with a 5 degree angle on both ends. Then cut out 4 long boards with a straight cut, these will be the cross supports. Attach them at an even spacing flat to where the plywood will rest.

With the plywood rest assembled, attach it to the base frame.

Build the storage bin
Cut and attach two 2x4's that will be the outside corners of the bin. Once that is done, scribe the size for the sides, then cut and attach them.

Finally, add the longer back board and complete the bin.

Add the railing and lip
Attach the 2x4 that will be the outer lip and keep the material from sliding out.

For the railing, cut a square slot out of the 2x4 supports that will fit the railing bar comfortably but tightly. Attach those supports and slot in the railing.

Flip and attach the wheels
Flip the cart onto its side and attach the wheels. Be sure to use the extra support pieces that we added at the beginning. Also, add a washer around each screw so that the wheels are held tightly in place. Once the wheels are all attached, flip the cart back over.

Apply finish to the cart
I chose to stain my cart but you can finish yours however you like, with paint, sealer or a different stain.

Load up the Plywood Cart!
The cart is done! Load it with whatever material you have laying around and fill the bin! Enjoy your clear floor and mobile Plywood Cart!

