

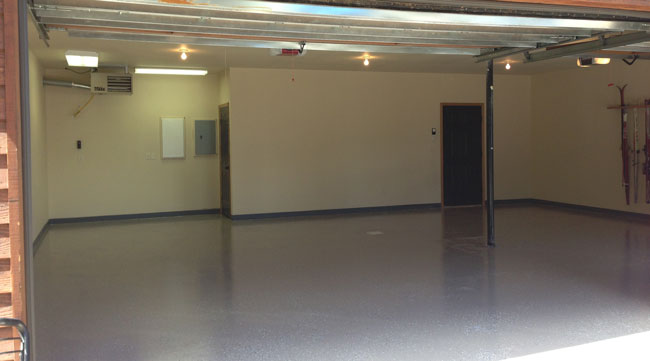
Epoxy garage floors are a great DIY project you can do to spruce up your home. Epoxy will make your floors look nice, clean up easily, and give your garage a finished look. Over the years I've epoxied about 10 garages for friends and family. All of them have turned out great, and the floors have held up extremely well.

I chose epoxy over garage floor paint because it is a much more durable and long-lasting finish. The key to having a long-lasting epoxy garage floor is to properly prep your floors. I am going to relate the prep project to one of my favorite quotes by Abe Lincoln.
If I had 8 hours to cut down a tree, I'd spend 7 of them sharpening my axe.”
This quote rings true in the world of epoxy floors. You must spend the time to properly clean and prep your garage. If you do, the end results will be fantastic.
In this post I will show a DIY epoxy garage floor I recently did for the family. Usually, I start with a bare concrete floor, but this particular garage had been painted years ago with epoxy and was needing a facelift. The steps are very similar to that of doing a garage without a coating previously on them. I will show photos from various projects I've done so you can get a good idea of what your floor will look like. Let's go through the basics.
Average epoxy garage floor cost DIY to do a 2 stall using ArmorSeal HS1000 – Between $300-$425. Epoxy garage floor costs vary depending on labor and the quality of the materials used.
If you'd prefer to listen to this post instead of reading, simply click the play button here! Read by Hudson Valley Epoxy Flooring: http://www.hudsonvalleyepoxyflooring.com/
Materials Needed for the DIY Epoxy Garage Floor:
Prep:
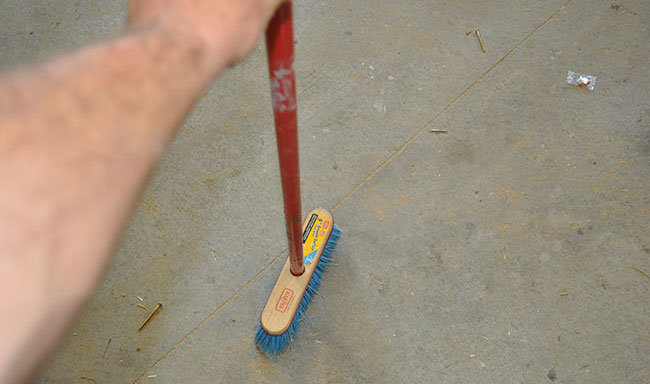
BroomPush SqueegeeConcrete EtcherPower Washer – Borrow from a friend if available – Optional (do not need to use if garage floor is newer or very clean)Scrub Brush with hole for stand up handleConcrete Crack Filler – Fill in larger cracks if needed (Available at Home Depot)
Painting
Quality Paint Brush3/8″ nap roller – 9″, 12″, or larger (your preference)Paint roller trayArmorSeal 1000 HS Epoxy from Sherwin Williams – (Buy at your local store) – Approximately $85/gallon. Need a part A and Part B – 2 coats recommendedCoverage – Approximately 206-350 Square feet per gallon. When mixing part A and B (2 total gallons) you'll be able to cover between 412 and 700 square feet. I was able to do this garage with 2 coats (850 square feet) using 2 gallons of part A and 2 gallons of part B. Buy less and if you need more you'll be able to have additional paint mixed up.* Sherwin William will custom mix your epoxy. I chose to go with a tan/brown color. Our dirt has a lot of clay and iron in it, so the color we picked hides dirt and mud well. Flakes also help. Ask your local representative what they'd recommend. Decorative Flakes – OptionalPaint Thinner (to clean brushes)Painters tapePaint Respirator Mask
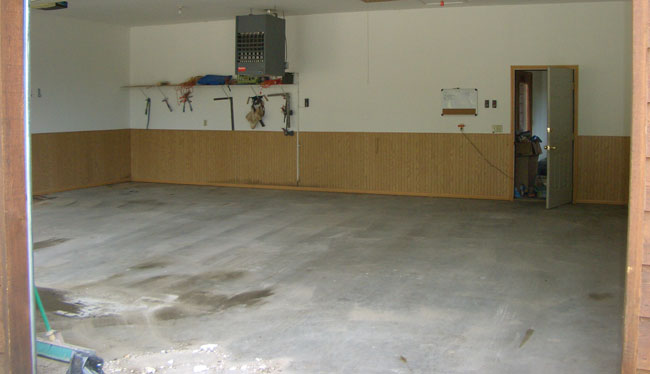
1. Remove everything from your garage floor
The first step is to take everything out of your garage. You'll need to have the items out of the garage for 48 hours after the second coat is applied. I typically move a few things into the house and other items into the driveway or yard. Cover everything with a tarp in case it rains.

2. Sweep the Garage
You'll want to remove dirt and debris from the garage using a shop broom. Use a smaller broom to clean out the corners.
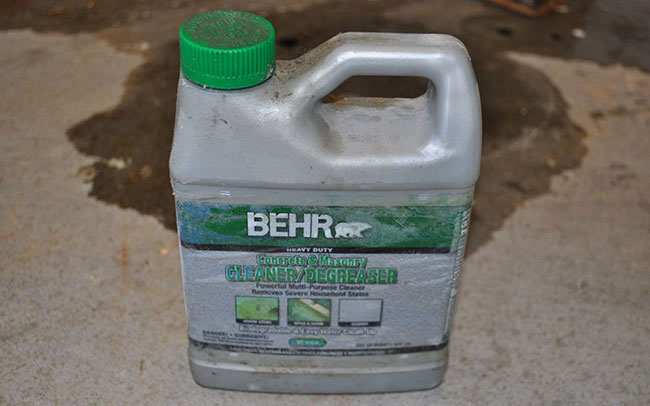
3. Clean oil spills and remove paint. Etch Concrete
Chances are, you'll have a fair amount of gunk on your concrete floor. You will need to clean everything as good as you can prior to applying epoxy. Use a rigid bristle scrub brush to clean oil spots. Pour concrete etcher (available at Home Depot) on each oil spot, let soak in, and then scrub. For paint drops, use a razor or orbital sander to get rid of them.
Another great tool for removing gunk from the floor is called a wet concrete polisher. If you have one, it will make removing paint drops and other gunk a breeze. This is not necessary though.
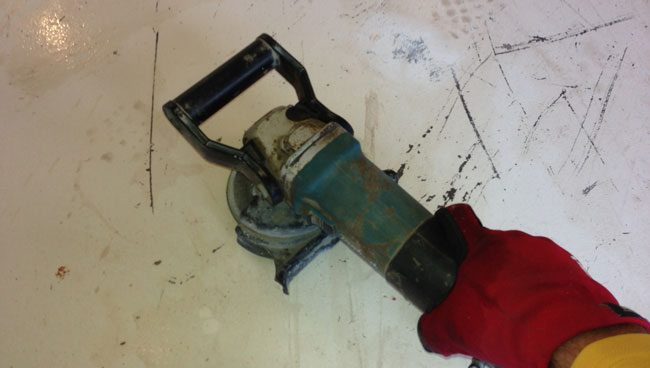
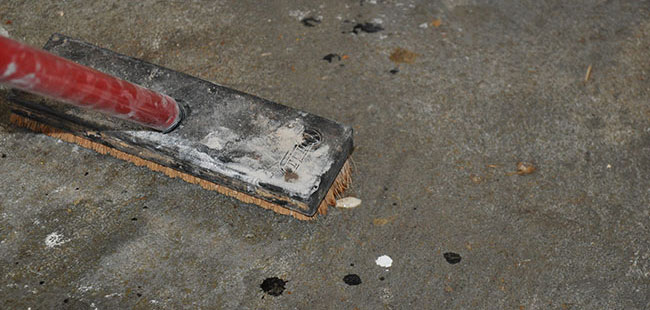
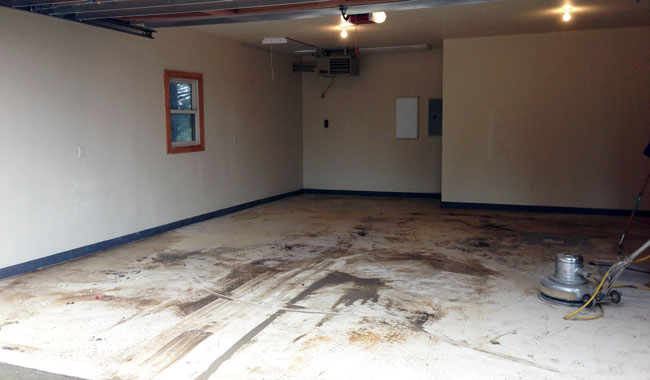
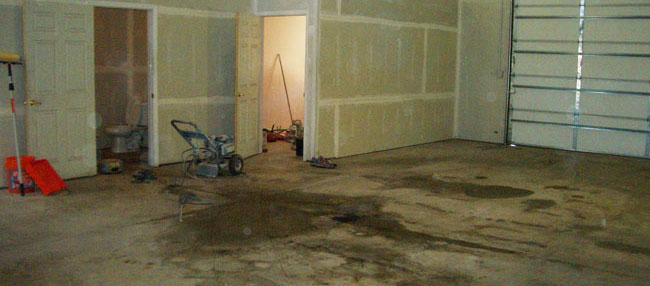
Here is a photo of a floor I did that had been painted in the past. If you are in this situation, make sure to clean the floor very well. Then, scratch up the surface so the new epoxy will be able to bond to it. For this process, I rented a floor buffing machine and used both the black and green scotch pads.
4. Clean entire floor
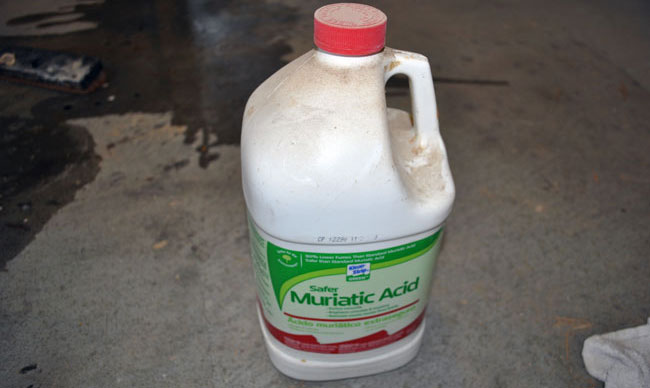
Once you've focused on cleaning the worst areas, use a hose to get the entire surface wet. Periodically sprinkle the etcher or cleaner/degreaser evenly around the entire area and scrub the whole floor using your brush. Etching the concrete will give the epoxy a better surface to bond to. If you'd prefer, you can also use muriatic acid to etch the concrete. Be very careful with it though. Put a 1 to 10 ratio of muriatic acid to water in a bucket and evenly pour on your floor. (1 part acid, rest water) Make sure to wear a respirator, rubber boots, and rubber gloves.Do not get muriatic acid on your skin. If you'd prefer not to use muriatic acid, you can use a non acidic concrete etcher (found at Home Depot). It will do the job. Once you've finished scrubbing, use a push squeegee to remove all the water from your garage.
5. Power Wash
If you have access to a power washer I'd recommend using one. It can help remove stains and other grime. A 3000 PSI pressure washer is ideal, but any pressure washer will be better then none. Borrow a friend or neighbors if you can!
6. Squeegee and let dry
After you've finished scrubbing, etching, and powerwashing, squeegee all the water out of the garage. Let your garage dry out overnight prior to getting started with the epoxy. The garage must be 100% dry.

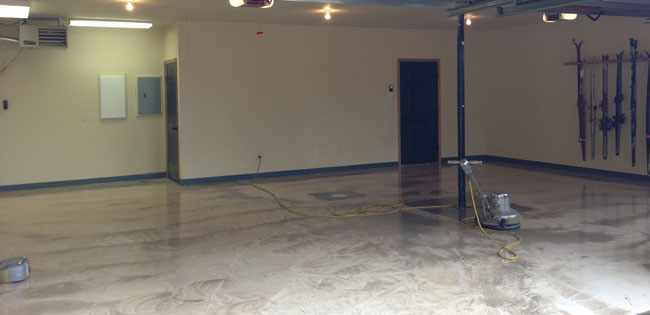
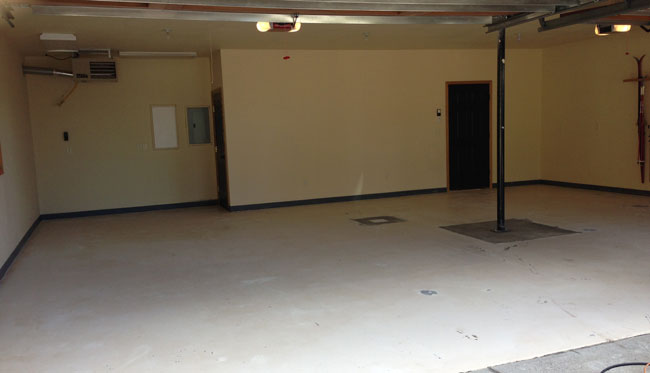
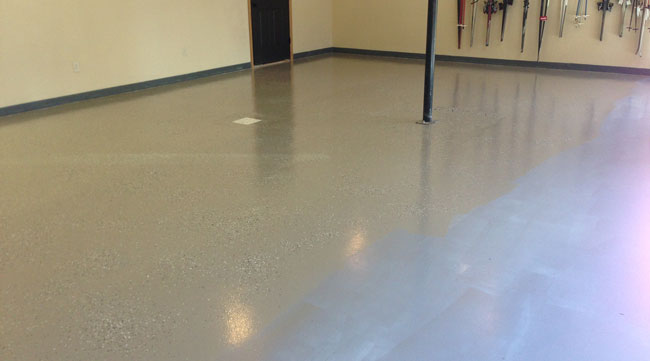
If you are painting over an existing epoxy floor, your prepped floor might look like the photo below. I used a floor buffing machine to scratch and clean the surface as much as possible.
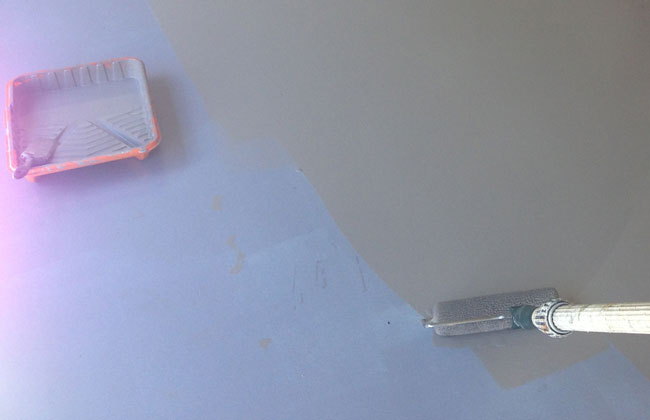
7. First coat of epoxy
Finally, onto the exciting transformation. You will need a brush, roller, and epoxy to get started. For all my projects I use a two part solvent based epoxy from Sherwin Williams called HS1000. Solvent based epoxies bond very well and are super durable. I like to start by going around the entire perimeter with a brush to get next to the walls. Simply paint the epoxy on. Once you are finished with the trim, use your roller to get a nice even coat of epoxy on the rest of the floor. Work in small 4×4 sections at a time.

8. Let the first coat dry overnight. Relax and have a cold one!

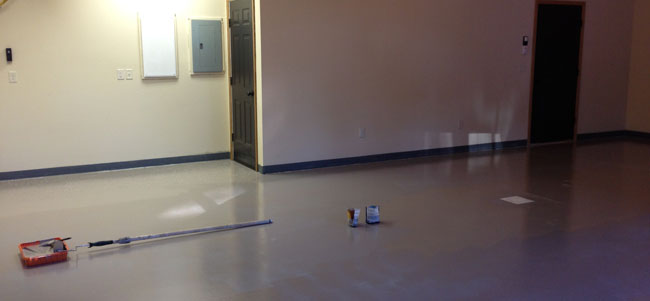
9. Apply second coat
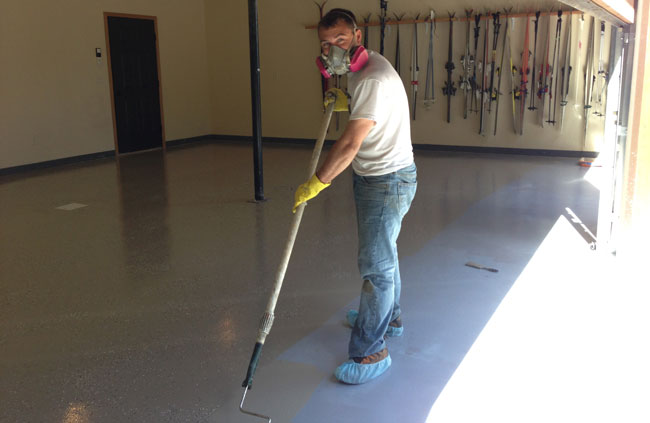
The second coat will make the floor look complete. First do the trim, then fill in the remaining areas with the roller. Work in small 4×4 sections. If applying flakes to your finish, sprinkle them on in random patterns right after painting each small section. The flakes will fall into the wet paint which will give your finished floor a terrazzo like finish.
 In the photo below I just started the second coat using the roller. The small section in the back left was painted and then I sprinkled the decorative flakes over it. Work in small sections so you can apply the flakes to the wet surface evenly and without the paint drying.
Continue working your way out from the corner you started in. Below is a photo once I was about halfway through the second coat.
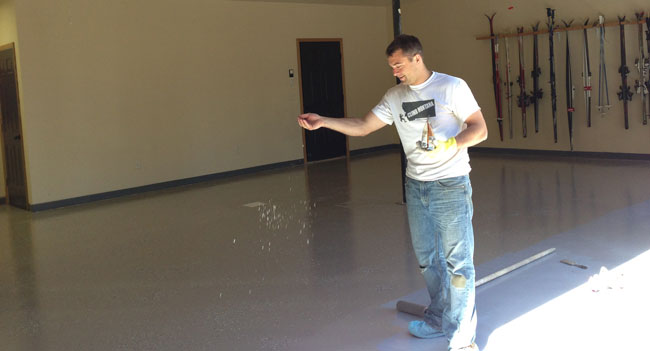
 To spread the flakes grab a small handful, throw them in the air, and let the flakes fall on the wet paint.
10. Let second coat dry for a minimum of 48 hours
Let your second coat dry for 48 hours. Once dry, you may move items back in the garage. Allow the paint to fully cure for 5-7 days before driving a vehicle in the garage.
I purchased about 3 bottles/bags of decorative flakes from home depot to give the floor a terrazzo like finish. soap packaging boxes near me

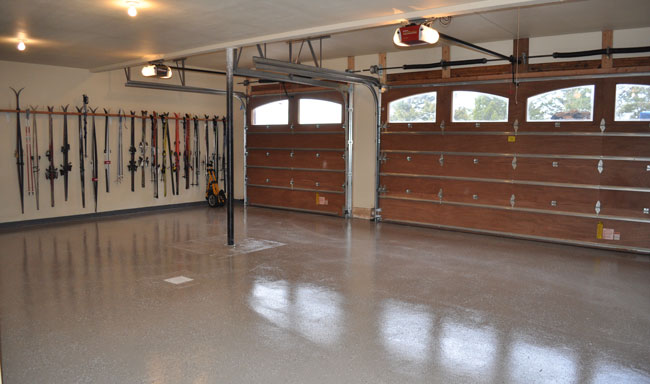
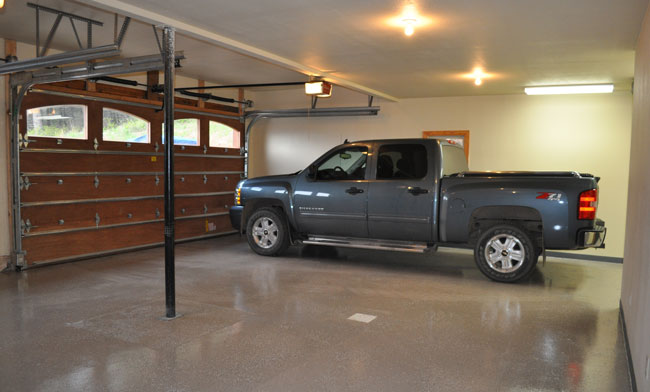
I created this tutorial to show some of the basic steps involved in creating a high end DIY epoxy garage floor finish. Take the time to prep your garage. With proper preparation your floors will look great and will last for many years to come. This will resist oil stains, clean up easily, and look awesome. Good luck and comment below if you have any questions! Cheers – Pete