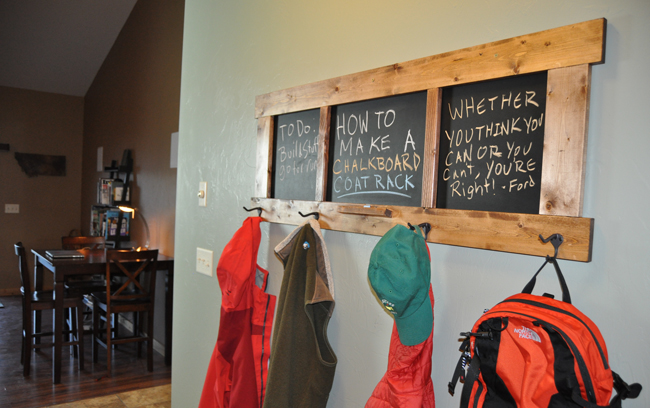
The other we decided to build a new coat rack with a rustic touch. We had a vision of what we wanted to create and got to it. For wood, we used some wood off a trailer I recently restored in my How to fix up an old trailer post. However, you could build this out of any type of wood very quickly and easily.
Shopping List:
QTY 1 2x4x8 Pine for bottom board $2.50
QTY 1 1x3x8 Pine for top board and vertical panel boards
QTY 1 Sheet of playwood ( 4 feet by 15 inches ) Used as the chalkboard
Chalkboard paint – Spray or roll on — (We used Spray Paint)
QTY 4 Coat rack hooks – We used oil rubbed bronze hooks from home depot (they came with tiny screws to mount them)
Chalk – Found the chalk at Target
Tools Needed
Saw ( Miter Saw, Circular Saw, or Handsaw )
Drill – Used for attaching chalkboard to wall and for attaching hooks
Kreg Jig or pocket hole tool – To attach 2×4 to the plywood (could also use screws)
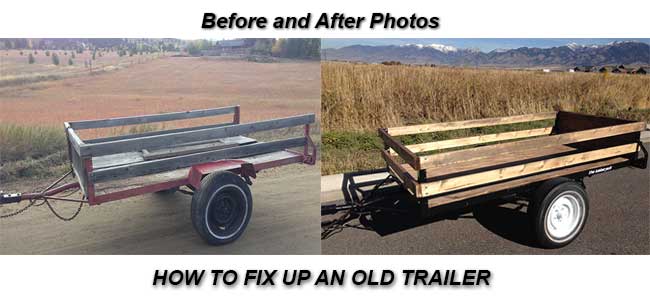
 I thought it would be fun to show where we got the wood for the project. Last month I found an old trailer on craigslist and completely restored it on a Saturday. The front of the trailer had a wood panel that I removed and wanted to use for a project. If you can't find barnwood or wood off an old trailer, you could simply patina the wood or use pallet wood to get a neat look. To learn how to patina wood go to my farmhouse table post. For an example of what pallet wood looks like please check out my DIY wine rack project.
 Cut List:
QTY 1 2×4 – 50″ (used for bottom of chalkboard where hooks are)
QTY 1 Plywood – 1/2″ or 3/4″ thick — 4 feet wide by 15″ tall
QTY 1 1×3 or 1×2 – 50″ (used as top board)
QTY 4 1×3 – 12″ (vertical chalkboard pieces)
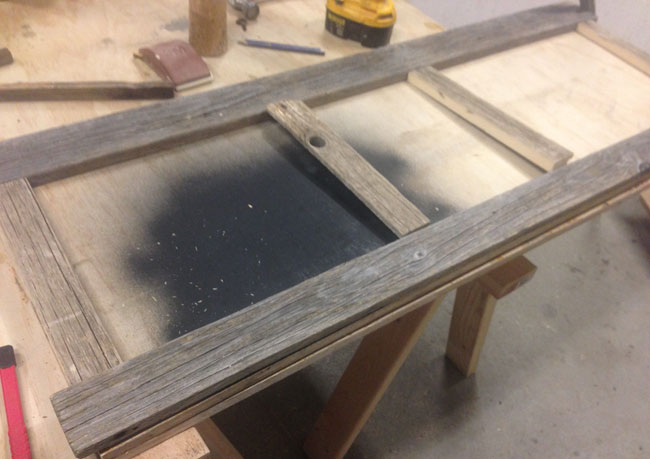
Here is a photo of the panel I ripped off the old trailer. The plywood was pretty beat up, so we replaced it with nice new sanded plywood. Use sanded plywood so the chalkboard is smooth.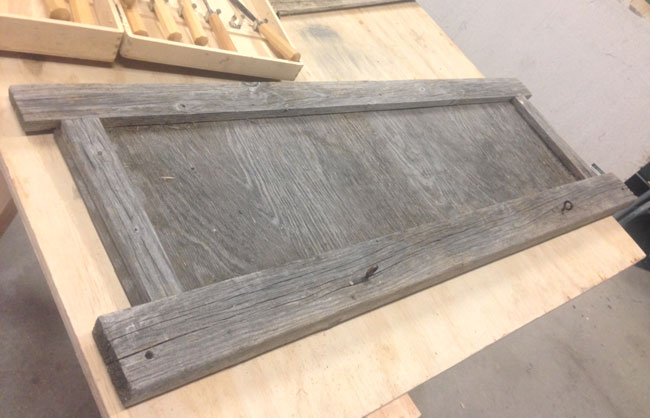 Below is a photo showing the new piece of plywood we cut and how we planned to layout the panels. We made the outside panels the same size and the center a bit more narrow. The black paint was a test area we did with the chalkboard paint.
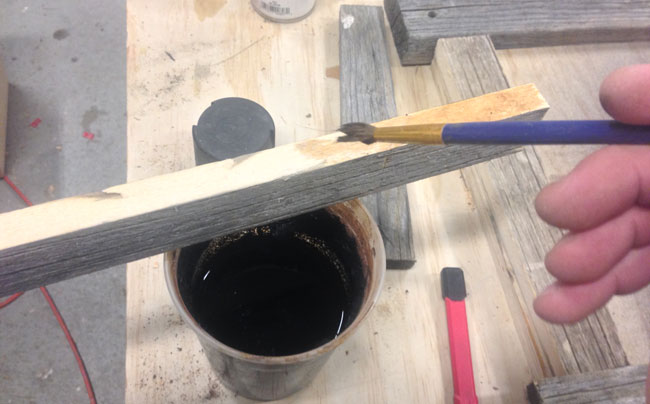
 When cutting old wood your cuts will look like new wood and won't match the rest of the barnwood. To help it blend in, we patina'd the wood using a steel wool and vinegar mixture similar to the process used in the farmhouse table post.
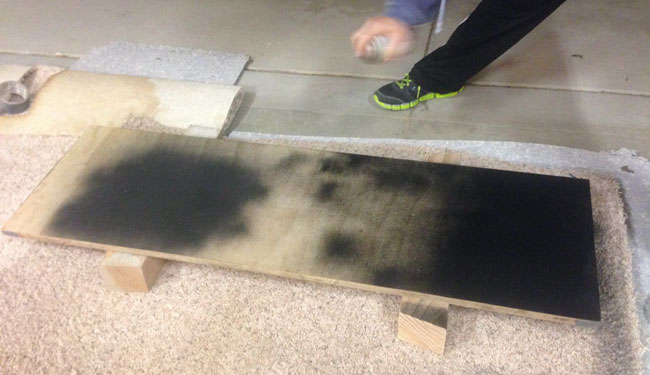
 Prior to attaching all of the wood to the chalkboard we sealed the wood using a Minwax Water Based Sealer. We chose the sealer because it is designed to go on clear and not affect the color. We spray painted the plywood and let it dry over night.
 After painting we laid out the wood and attached it to the chalkboard using small 1 1/4″ nails and a hammer. We attached the bottom 2×4 to the plywood using a Kreg Jig to make pocket holes. If you don't have a Kreg Jig you could modify how it is attached.
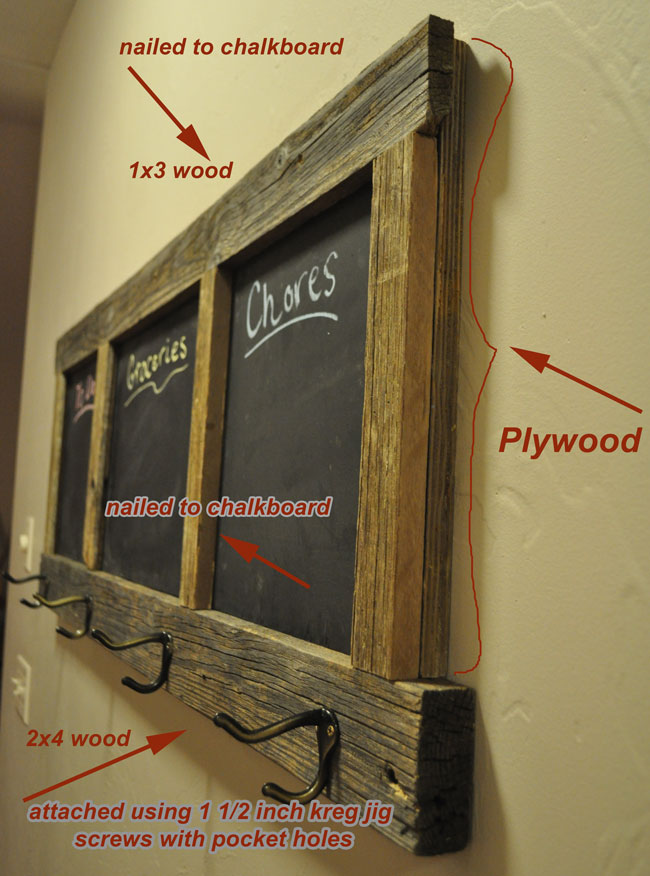 Find coat rack hangers and attach using small screws and a drill or screwdriver. We attached the coat rack to the wall using two 3.5 inch screws. We found the studs in the wall ( 16″ on center ) and put a screw into each stud.
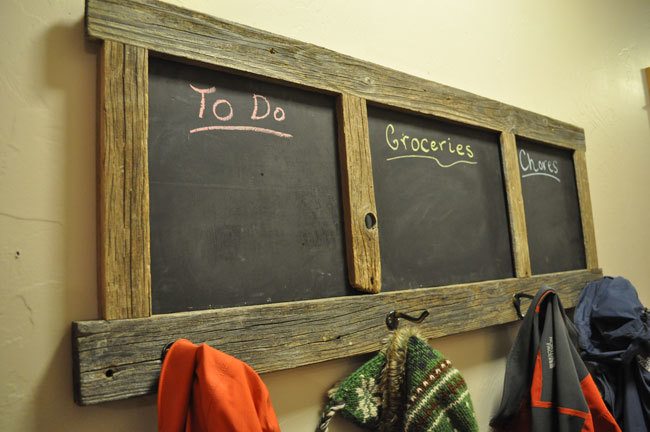
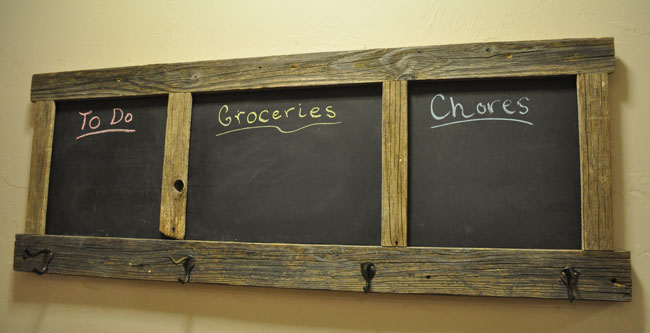 Enjoy your new coat rack! Great to use as a message board or for to do lists!
 Please pin and share if you like this project!
Please note you can check out a new version of this chalkboard where I build the chalkboard out of new wood by clicking here. There is a complete video tutorial and downloadable plans as well.